Anchors Away!

This forum is for comments and the exchange of information relating to Trojan Boats and boating. Please do not post used parts or boats For Sale in this area. For general, non-boating topics please use our "General Discussions" section.

Note: Negative or inflammatory postings will not be tolerated.

Moderators: BeaconMarineBob, Moderator, BeaconMarineDon

Post Reply
User avatar
aweimer
Moderate User
Posts: 290
Joined: Tue Sep 15, 2009 9:01 pm
Location: Chciago, IL

Anchors Away!

Post by aweimer »

Two weeks ago we launched our first Trojan 36' Tri-Cabin. I did purchase it last year late season but this is our first full year aboard. Over the winter i did a lot of work to make her ready for a great summer of family fun. We use her as a live aboard in Ohio when we are out visiting our family on the weekends.

The List:

1. Re-caulked all windows - Talk about 35 year old caulk!

2. Refurbished the rub rail all the way around. There were a few totally rotted sections that were replaced, some soft that were filled with mahogany chips and west systems (i love this stuff). Sealed with CPS penetrating Appoxy and varnished to a nice shine. Caulked top with clear and bottom with fresh 5200.

3. Pulled front hatch and repaired some minor spongy decking. Previous owner didn't keep up with the caulking on the anchor mounts or the hatch itself. This was a bit of work, however i had a solution. I drilled a couple top holes and cleaned out as much as possible, let it dry well and pored in some thinned west systems. Followed with some full strength. I then drilled a few wholes through the core of the balsa and pumped in more with a refillable caulk gun. Finished by sealing the hatch edges with CPS to seal it forever from its watery enemy. The foredeck is solid as a rock. Sanded and repainted the hatch and mounted it all in with a fresh seal of 5200.

4. Sanded aft teak deck down to bare wood and sealed with CPS penetrating appoxy, finished it with two nice coats of varnish.

5. Installed the Garmin 540s. Did the shoot through hull method that i seen posted here, worked like a charm. Installed the new GPS antenna and then proceeded to weed through 35 years of wiring and pull out a basket full. Heck the VHF radio had 3 in line fuses by the time i traced it back to the connections. I would bet there were 3 radios installed in her life. lol

5. Caulked, caulked and caulked some more. Did all the floor trim side and edges of the aft and bridge area. Caulked so well I'm sure if I sealed the scuppers it would hold water. :)

6. Installed new 115v 30a connections, old ones were in rough shape, one side had a broken pin.

7. Install all new carpet yesterday from stem to stern, wow did that freshen up the place!

8. This last weekend i completed the oil change with a fresh filter and some nice mobile 1 15w50.

I do however have one issue that i need some input on. Last season before storing her away i filled the fuel tanks full. I noticed this only when i filled it full that i had gotten a small amount of fuel into the bilge. When replacing the carpet this weekend i found an access that allows you to replace the sender units and access to fuel shut off on the rear top of the tanks. There is some rubbery black caulk used on these locations and the caulk on the sensor looks a bit rough. Also would dried gas on the galvy tanks leave white runs? I don't have to say that gas in the bilge is bad bad to this group but I'm looking for some thoughts there. I was thinking of pressure testing the tanks. However I'm not quite sure how to accomplish that. They have over flows to the outside and the connections to these things are not simple to get too. I was thinking of applying 4-5 lb of pressure through the overflows and have the fuel line T off. Then spraying soapy water on the overflow connections and the fuel senders for leaks. That sounds like a good first step, applying the pressure is the road block, how and with what? Thoughts?

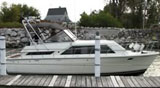
Thanks and enjoy the photos.

http://photos.plaxo.com/photos/get/16/5 ... 41-m-0.jpg

http://photos.plaxo.com/photos/get/16/5 ... 38-m-0.jpg

http://photos.plaxo.com/photos/get/16/5 ... 39-m-0.jpg

http://photos.plaxo.com/photos/get/16/5 ... 40-m-0.jpg
Aaron
____________________________
1975 36' Tri Cabin
"Keep it up!"
E-Mail : aweimer@comcast.net
Lake Erie, OH
http://s1099.photobucket.com/albums/g39 ... 20It%20Up/
S.A.M.
Moderate User
Posts: 204
Joined: Wed Oct 08, 2008 3:03 pm
Location: N.W. Florida

Post by S.A.M. »

I have no advice on the pressure testing, just wanted to say congrats on the hard work and getting her bottom wet.

Enjoy!
Sherman
'90 10m Midcabin
Danny Bailey
Moderate User
Posts: 478
Joined: Thu Dec 29, 2005 10:44 pm
Location: Oriental, NC

Post by Danny Bailey »

Congrats on finishing a long list of hard work. On the gas tank leaks: Do not put 4 - 5 psi on installed gas tanks. You are subject to blow your boat apart. Check your fill hose and vent hose. I'll bet you find one of them leaking.
1980 F-36 with 6BTA 250 Cummins enjoying the Sounds and coastal waters of North Carolina
User avatar
Big D
Ultimate User
Posts: 2874
Joined: Sat May 01, 2010 10:39 pm
Location: Ontario, Canada

Post by Big D »

I agree with DB. Don't pressurize the tank. It can be done but unless you're a trained tech with the proper equipment, it's just not worth the gamble.

Like DB, I'm also thinking it's one of your lines. Inspect the lines where they exit on the tank (vent line, fill line and lines going to engine and genny) for signs of aging (craking etc). Check that all clamps are in good shape and tight.

This may be a step in the wrong direction but the only way I was able to find a leak was to fill the tank until it was just below the fill fitting on the deck. Follow all the regular fueling proceedures. Have someone ready to catch fuel that will spill through the vent fitting (fill slowly), then clamp a piece of rubber hose over the vent hole to stop the overflow and continue to fill slowly until you're just below the deck. Put the cap on but do not tighten.

Open up all hatches and turn on the blowers. Shut down all electrical (except blower). Inspect all exits at the tank. While you're at it, check your welds along the top, sides, bottom etc. (what ever you can access). When you're done, it's good to have an oil extraction pump (manual vac type for oil changes) to insert through the deck fitting to removing the excess fuel.

When you inspect the vent hose, make sure it's going up hill all the way, and that it loops up higher than the hull fitting.

Hope it's as simple as a bad clamp. And don't forget to remove the piece of hose you clamped over the vent fitting!
She was a 1969 36 ft wooden beauty with big blue 440s that we'll miss forever.
And thanks to the gang, 2012 Trojan Boater Of The Year
jimbo36
Moderate User
Posts: 602
Joined: Mon Apr 21, 2008 9:20 pm
Location: Belleville, Ontario

Post by jimbo36 »

Big D, with all due respect, that sounds like the scarest test I have ever heard. First off, what do you do when the fuel starts squirting everywhere if, and it is suspected there is, a fuel leak? And, with a full to the brim fuel system, how do you deal with a repair with all that fuel. Got to be a better way to check the fill and vent lines than this method. As you said, "This may seam to be a step in the wrong direction" oh yeh. :shock: jimbo36
User avatar
Big D
Ultimate User
Posts: 2874
Joined: Sat May 01, 2010 10:39 pm
Location: Ontario, Canada

Post by Big D »

Done carefully, with plenty of air movement, one person below, one at the vent, and one filling at the deck. If there's a leak, and I suspect it's a line, you won't have to fill to the deck, you'll see it as soon as it clears the metal tube on the tank that the hose clamps to.

Any time you work on fuel tanks including something as simple as replacing a sending unit must be given the respect it deserves. It is dangerous and should only be approached if you are confident in what you're doing and that you've taken precautions, otherwise, as mentioned, hire a proffesional. You're right, this type of work should't be taken lightly, but I've done it a few times and am confident with the precautions I take.
She was a 1969 36 ft wooden beauty with big blue 440s that we'll miss forever.
And thanks to the gang, 2012 Trojan Boater Of The Year
User avatar
aweimer
Moderate User
Posts: 290
Joined: Tue Sep 15, 2009 9:01 pm
Location: Chciago, IL

Post by aweimer »

yeah the thought is its in the over flow. the only time i had gas below was when filling it to its max. I will probably just have the tanks checked by a pro. I've worked on vehicles for years but when it comes to fuel your playing with fire, no pun intended.

Thanks though, all is well for now though. Zero leaks, it just happened that once so i'm uneasy when i get gas. Checking the tank area while filling and notta so far.
Aaron
____________________________
1975 36' Tri Cabin
"Keep it up!"
E-Mail : aweimer@comcast.net
Lake Erie, OH
http://s1099.photobucket.com/albums/g39 ... 20It%20Up/
User avatar
k9th
Ultimate User
Posts: 1615
Joined: Fri Oct 31, 2008 10:31 pm
Location: Michigan City, IN

Post by k9th »

Congrats on finishing a long list of items. I am working through a list myself on our '79 Tri-cabin and one of them is replacing the tanks. I found that I had leaks where the fill pipe connects to the top of the tank.

Last year was our first year owning the boat and I noticed some fumes in the master stateroom where the tanks are located but only when I refueled and not every time I refueled - but I never saw any raw gas - anywhere. A mechanic checked and said I had an anti-siphon valve with dirt in it and it was stuck open. He cleaned it and I didn't have a problem again till much later in the summer when I refueled one day.

This year while going over items I wanted to replace in the master stateroom I lifted the mattresses and wood underneath covering the tanks and noticed a small crack around the top of each fill pipe connection. I even noticed what appeared to be some JB Weld that had been applied. That is when I decided to replace the tanks with new aluminum tanks. It is strange that the survey did not catch that little item.

Anyway with gasoline having more-and-more alcohol content, I decided that the new aluminum tanks would be a good investment. The galvanized tanks had lasted 30 years and it was time for them to be removed.
Tim

"SeaDog"
1979 36' Tri-Cabin
User avatar
randyp
Active User
Posts: 807
Joined: Thu Mar 09, 2006 3:32 pm
Location: Upstate New York

Post by randyp »

Congrats on bringing that boat back to life! I only have a single tank and it was galvanized. Tank started rusting on the INSIDE. This may be the case with yours. The age of the tank leads me down this road. Suggesting for aluminum tanks if solid. Checking inline fuel filted would be a way to determine if you are getting rust in the gas, which might help validate my suspiscion.

An expensive proposition to replace those tanks, but a lot better than BOOOM!!!!
Randy P
1977 F-26 HT
"Blue Heron"
Post Reply