Just checked out your video.
THERE SHOULD BE WATER RUNNIONG OUT OF YOUR SIDE EXHAUST HOLES !
Better check out this problem before starting them again !
This is SERIOUS !
RWS
Project: Trojan 10 Meter Express
Moderators: BeaconMarineBob, Moderator, BeaconMarineDon
-
RWS

- Ultimate User
- Posts: 2857
- Joined: Sat Feb 18, 2006 7:01 am
- Location: West Coast Florida
- Contact:
1983 10 Meter SOLD after 21 years of adventures
Yanmar diesels
Solid Glass Hull
Woodless Stringers
Full Hull Liner
Survived Andrew Cat 5,Eye of Charley Cat 4, & Irma Cat 2
Trojan International Website: http://trojanboat.com/
WEBSITE & SITELOCK TOTALLY SELF FUNDED
Yanmar diesels
Solid Glass Hull
Woodless Stringers
Full Hull Liner
Survived Andrew Cat 5,Eye of Charley Cat 4, & Irma Cat 2
Trojan International Website: http://trojanboat.com/
WEBSITE & SITELOCK TOTALLY SELF FUNDED
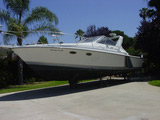
Thx for the feedback. Just an fyi, I'm planning on painting the sides so they will be bright white (if that's what I end up going with).
Also, yes I did have the water on when running the motors but not full bore. It was certainly enough to avoid any dry running of the rubber props in the pumps. I didn't have the motors running very long and I watched the temps.
Also, yes I did have the water on when running the motors but not full bore. It was certainly enough to avoid any dry running of the rubber props in the pumps. I didn't have the motors running very long and I watched the temps.
-
aaronbocknek
- Ultimate User
- Posts: 2080
- Joined: Fri Sep 12, 2008 8:19 am
- Location: baltimore, md (alexandria, va and middle river,md) PARKSIDE MARINA
-
RWS
- Ultimate User
- Posts: 2857
- Joined: Sat Feb 18, 2006 7:01 am
- Location: West Coast Florida
- Contact:
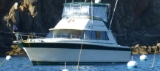
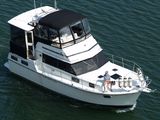
Here's one in blue, if you want to see the real thing
http://baltimore.craigslist.org/boa/2520589638.html
RWS
http://baltimore.craigslist.org/boa/2520589638.html
RWS
1983 10 Meter SOLD after 21 years of adventures
Yanmar diesels
Solid Glass Hull
Woodless Stringers
Full Hull Liner
Survived Andrew Cat 5,Eye of Charley Cat 4, & Irma Cat 2
Trojan International Website: http://trojanboat.com/
WEBSITE & SITELOCK TOTALLY SELF FUNDED
Yanmar diesels
Solid Glass Hull
Woodless Stringers
Full Hull Liner
Survived Andrew Cat 5,Eye of Charley Cat 4, & Irma Cat 2
Trojan International Website: http://trojanboat.com/
WEBSITE & SITELOCK TOTALLY SELF FUNDED
Gents,
While I'm working on my seacock issues, thought I would share some progress I'm making in other areas. I've been working on the genset and below is my progress. As you can see it was pretty rough. I pulled off the heads and the cylinders and valves were actually in pretty good shape. So I stripped it down, inspected, repaired,cleaned, and painted. I still need to do the cover and the wiring but here's what I got so far. When I do get to fire the ole girl up I'll post a video. cheers.
Before......


After......


While I'm working on my seacock issues, thought I would share some progress I'm making in other areas. I've been working on the genset and below is my progress. As you can see it was pretty rough. I pulled off the heads and the cylinders and valves were actually in pretty good shape. So I stripped it down, inspected, repaired,cleaned, and painted. I still need to do the cover and the wiring but here's what I got so far. When I do get to fire the ole girl up I'll post a video. cheers.
Before......
After......
-
RWS
- Ultimate User
- Posts: 2857
- Joined: Sat Feb 18, 2006 7:01 am
- Location: West Coast Florida
- Contact:
You're lucky.
When i went to work on mine, I found the bolts just twisted off when I tried to remove them.
Looks like you are going about his project the right way and with the right attitude.
You results will most certainly pay off.
Hoses, thru hulls, etc, really nice way to do this project properly.
You will ultimately have a boat that you can depend on not to let you down.
RWS
1983 10 Meter SOLD after 21 years of adventures
Yanmar diesels
Solid Glass Hull
Woodless Stringers
Full Hull Liner
Survived Andrew Cat 5,Eye of Charley Cat 4, & Irma Cat 2
Trojan International Website: http://trojanboat.com/
WEBSITE & SITELOCK TOTALLY SELF FUNDED
Yanmar diesels
Solid Glass Hull
Woodless Stringers
Full Hull Liner
Survived Andrew Cat 5,Eye of Charley Cat 4, & Irma Cat 2
Trojan International Website: http://trojanboat.com/
WEBSITE & SITELOCK TOTALLY SELF FUNDED
I Just wanted to give an update on the project. I’ve finally finished the generator re-furb. I still need to check/tune the voltage outputs but its running pretty well. The electronic circuitry on these Onans can be a challenge. They separate the start ignition system from the run ignition system. And all of it is handled via relays, resisters and sensors including exhaust temp, water temp, oil pressure, voltage output, etc. The good news is as a result I know this thing inside and out!
For you visual people like myself, here is a youtube video of it running:
http://www.youtube.com/watch?v=HwMaTRniOTE
For you visual people like myself, here is a youtube video of it running:
http://www.youtube.com/watch?v=HwMaTRniOTE
Project Update. I finished repairing the delamination where the old seacocks were. Since I’m going to be installing new seacocks I decided to fill the holes entirely. I also filled in a hole from an old depth finder sonar that I won’t be using. The starboard side seacock location was also delaminated but not nearly as bad. Below are some pics.
This is what it looked like when I started….ugly!

This is the port side seacock area after the last layer of West System 105/206 epoxy and 1708 biaxial cloth. The top layer you see (that looks wet) is over the previous layers that I sanded to keep everything as level as possible during the layups. I used West’s 407 filler for the initial filling of the holes to give the first layers of cloth a smooth base for good adherence. Of course all of the layers were rolled out to remove any air bubbles. The area is @ 12†wide.

This is the bottom view. You can see the 407 filler in red. I put on a couple of layers of regular woven cloth for extra protection.

I made sure to leave a little clearance in depth for the use of the 407 filler for fairing it all in. This is the 407 applied.

This is the port side finished area. After sanding the 407 flat with the surrounding area I surface coated the entire area with West’s 422 barrier coating to provide the best barrier protection and moisture exclusion.

This is the starboard side finished area.

This is the bottom side finished area.

This is what it looked like when I started….ugly!
This is the port side seacock area after the last layer of West System 105/206 epoxy and 1708 biaxial cloth. The top layer you see (that looks wet) is over the previous layers that I sanded to keep everything as level as possible during the layups. I used West’s 407 filler for the initial filling of the holes to give the first layers of cloth a smooth base for good adherence. Of course all of the layers were rolled out to remove any air bubbles. The area is @ 12†wide.
This is the bottom view. You can see the 407 filler in red. I put on a couple of layers of regular woven cloth for extra protection.
I made sure to leave a little clearance in depth for the use of the 407 filler for fairing it all in. This is the 407 applied.
This is the port side finished area. After sanding the 407 flat with the surrounding area I surface coated the entire area with West’s 422 barrier coating to provide the best barrier protection and moisture exclusion.
This is the starboard side finished area.
This is the bottom side finished area.
-
RWS
- Ultimate User
- Posts: 2857
- Joined: Sat Feb 18, 2006 7:01 am
- Location: West Coast Florida
- Contact:
Mark, you are doing everthing right on this project.
You will certainly have something special when you're done and the sweat equity thing really pays off, I know !
RWS
You will certainly have something special when you're done and the sweat equity thing really pays off, I know !
RWS
1983 10 Meter SOLD after 21 years of adventures
Yanmar diesels
Solid Glass Hull
Woodless Stringers
Full Hull Liner
Survived Andrew Cat 5,Eye of Charley Cat 4, & Irma Cat 2
Trojan International Website: http://trojanboat.com/
WEBSITE & SITELOCK TOTALLY SELF FUNDED
Yanmar diesels
Solid Glass Hull
Woodless Stringers
Full Hull Liner
Survived Andrew Cat 5,Eye of Charley Cat 4, & Irma Cat 2
Trojan International Website: http://trojanboat.com/
WEBSITE & SITELOCK TOTALLY SELF FUNDED
-
alexander38
- Ultimate User
- Posts: 3179
- Joined: Sat Sep 27, 2008 6:48 am
your work looks great !...... played the Onan vid and my better 1/2 Michelle new right a way what it was as soon as the starter hit the fly wheel, and said it sounded good.... 
Carver 3607 ACMY 454's Merc's
10' Dinghy 6hp Merc.
La Dolce Vita
Let's hit the water !
http://s852.beta.photobucket.com/user/t ... 8/library/
10' Dinghy 6hp Merc.
La Dolce Vita
Let's hit the water !
http://s852.beta.photobucket.com/user/t ... 8/library/
Finally making some progress. As you can tell from the pics below I'm working on one engine at a time, port side first. I stripped everything off the motor I could. Then I cleaned, cleaned, cleaned. Gave the motor a fresh coat of paint then the bottom with Bilgekote. Now I can start putting everything back together with the new exhuast components, etc. Hopefully progress will be going faster now!
Here are some before pics:


Here are the after pics:


Here are some before pics:
Here are the after pics:
-
297Elegante
- Sporadic User
- Posts: 162
- Joined: Thu Jun 24, 2010 10:11 am
- Location: CT