Page 5 of 22
Posted: Thu Mar 08, 2012 9:26 am
by jefflaw35
larryeddington wrote:Jeff, if there is enough room you may be albe to take the whole exhaust log off, the Studs are stainless and may come off easily. If they twist off, doesnt really matter as old engine trashed.
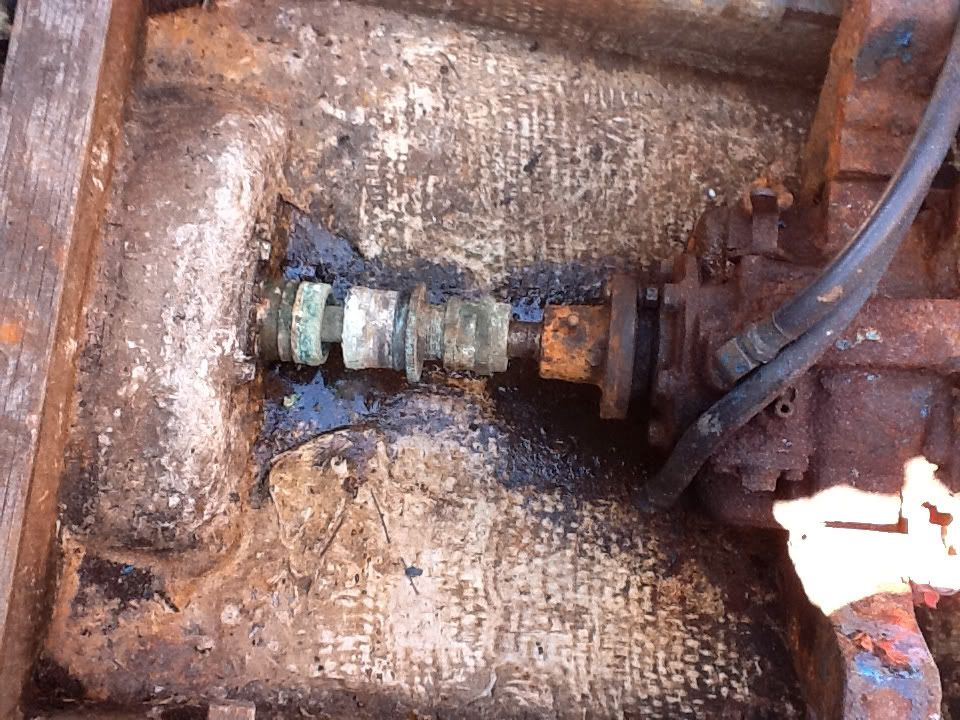
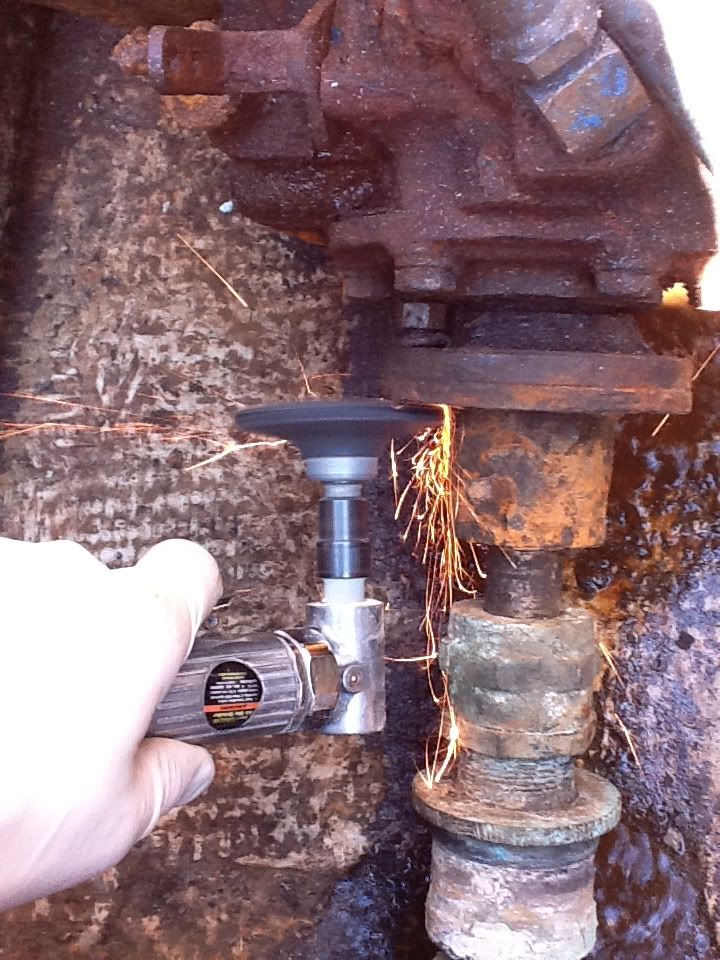
cant get a socket or wrench on any of the rounded heads, fresh water tank is in my way so i removed the fuel tank this morning so I can lay down and try to get under the motor so to speak. they are so rusted I maybe to chisel the nuts off or get my saw zaw down there
Posted: Thu Mar 08, 2012 8:42 pm
by Big D
Jeff, don't want this to veer off topic but just wanted a quick update on the check up you were having on your hand/fingers.
Posted: Thu Mar 08, 2012 11:29 pm
by jefflaw35
Its ok, thanks for asking Big D, I passed the nerve testing but had some below average results with blood circulation test this afternoon.vascular surgeon is throwing in the towel for now. Keep on same meds and going to see yet another new doctor. Looking for disease again. Lupus, connective tissue disease maybe, something bigger that maybe causing this Buergers, small blood vessel disease to flare up. It's starting to get expensive and cutting into my boat funds


Posted: Fri Mar 09, 2012 7:36 pm
by jefflaw35
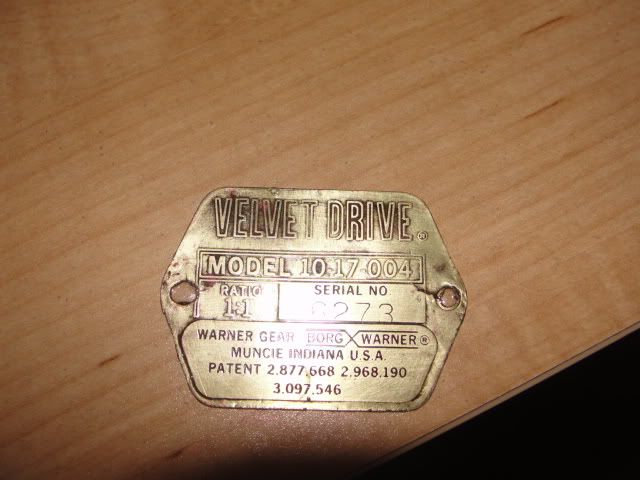
took a little bit of love but I was able to restore my Velvet Drive Tag, just thought it was neat.
Posted: Fri Mar 09, 2012 7:44 pm
by larryeddington
Cool I have new chrysler plakards for the exhaust manifolds. Boats take a lotta love. Wonder if they give back?
Posted: Fri Mar 09, 2012 7:59 pm
by jefflaw35
larryeddington wrote:Cool I have new chrysler plakards for the exhaust manifolds. Boats take a lotta love. Wonder if they give back?
to my understanding, never talk bad about her, but at the same time she is either broken or about to break and you just dont know when

Guess we will see buddy!! I sure am giving up alot more love to her than I am to myself latly. I just hope she loves me for one awsome record breaking day of fishing with my wife and kids...I will be very happy with that!
Posted: Fri Mar 09, 2012 8:02 pm
by larryeddington
They may be like a cat give love when they want to. But I aint saying bad things bout the Phoenix
Not going to tempt her
Posted: Sat Mar 10, 2012 12:37 am
by Big D
Nice job on the tag Jeff. It's the attention to detail on the little things that make a job stand out from the rest. Keep up the good work.
Hope things work out medically. That sounds like some serious s$$t.
Posted: Sun Mar 11, 2012 9:04 am
by jefflaw35
Posted: Sun Mar 11, 2012 11:10 am
by Big D
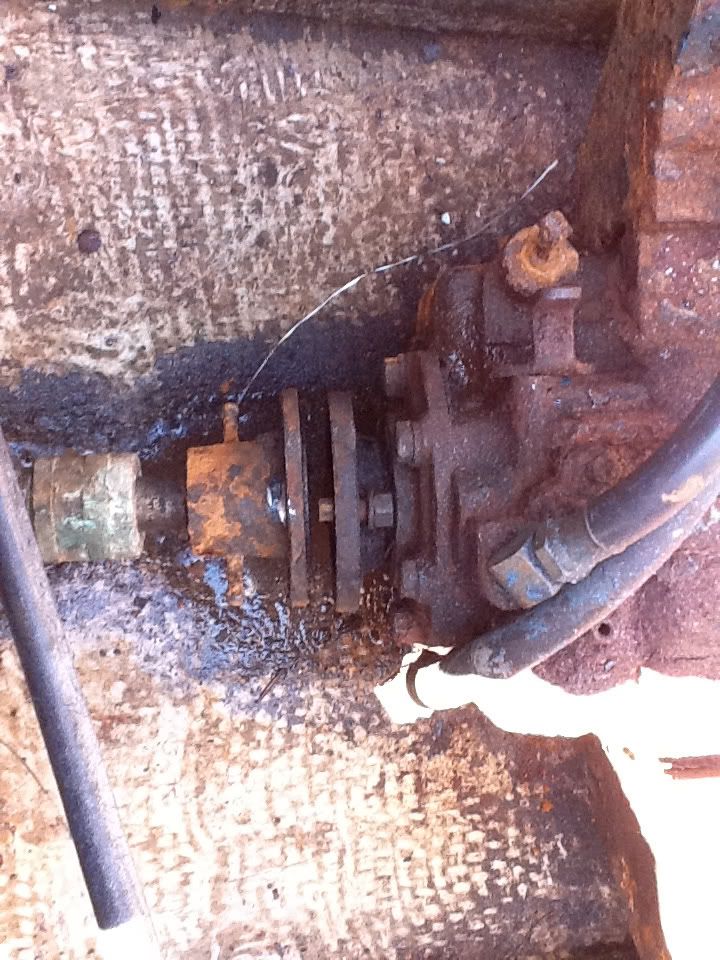
Jeff, did you dial the shaft yet? If it's not true, you'll have to remove it and send in for repair, or you'll have to replace it. To do that, I'm thinking you may have to cut that shaft behind the flange to get it out. Looks like the coupler is pretty badly rusted and may be an issue to get off, and I wouldn't be banging it up against the stern tube to remove it with a hammer puller at the prop end. That's usually done while it's still coupled to the tranny. The tranny looks pretty bad too, are you going to rebuild or get another one?
Posted: Sun Mar 11, 2012 1:08 pm
by jefflaw35
ive come to the conslusion that everything is being replaced

but I will feel safer on the water, Tranny maybe rebuildable, not sure yet
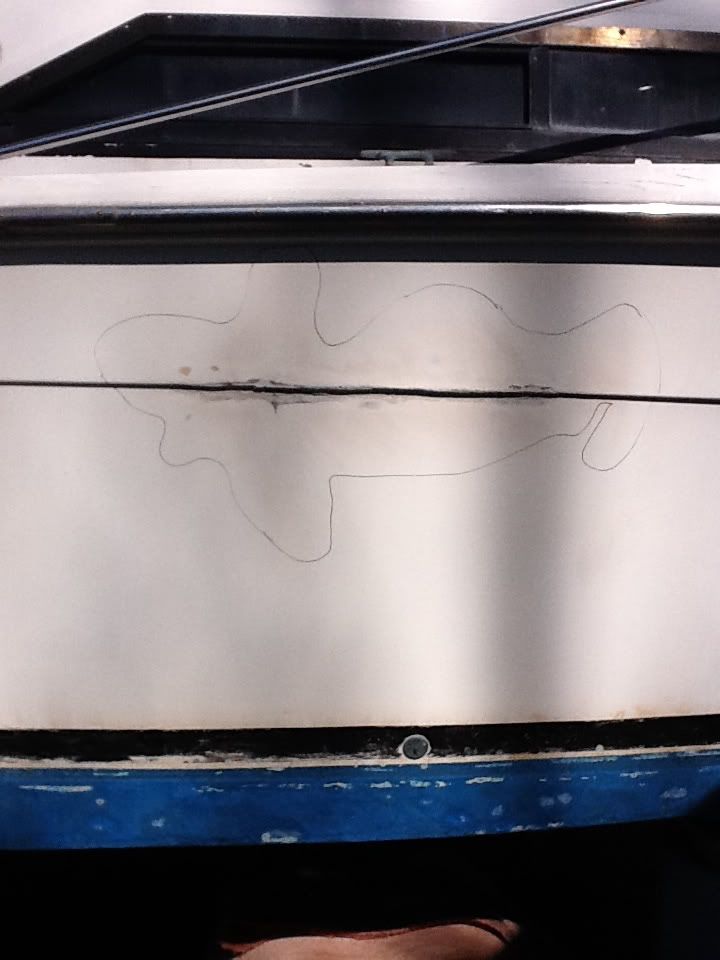
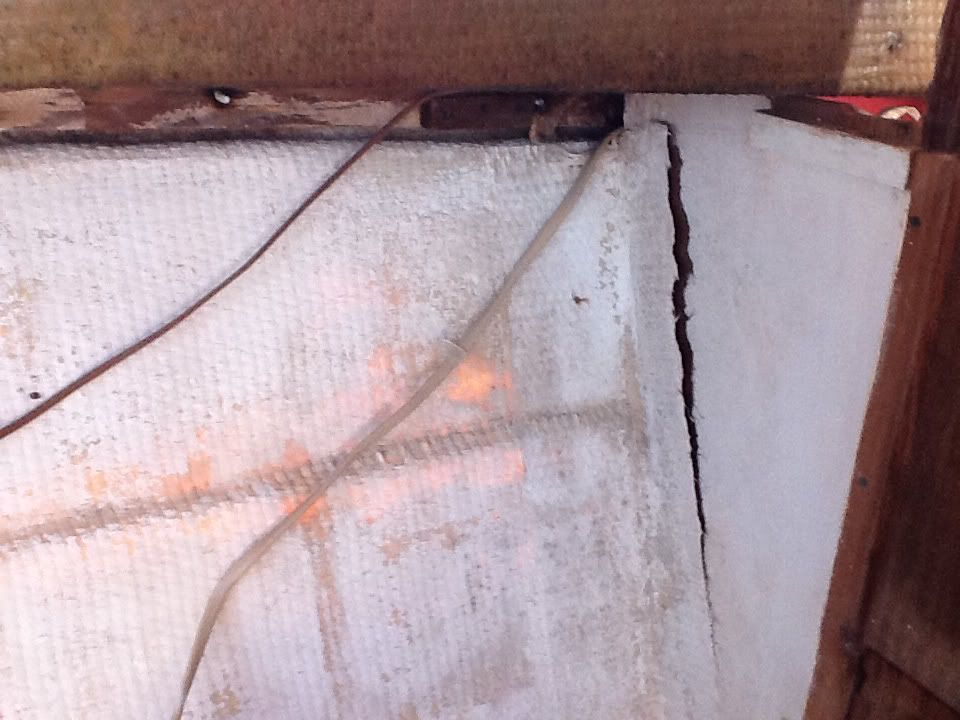
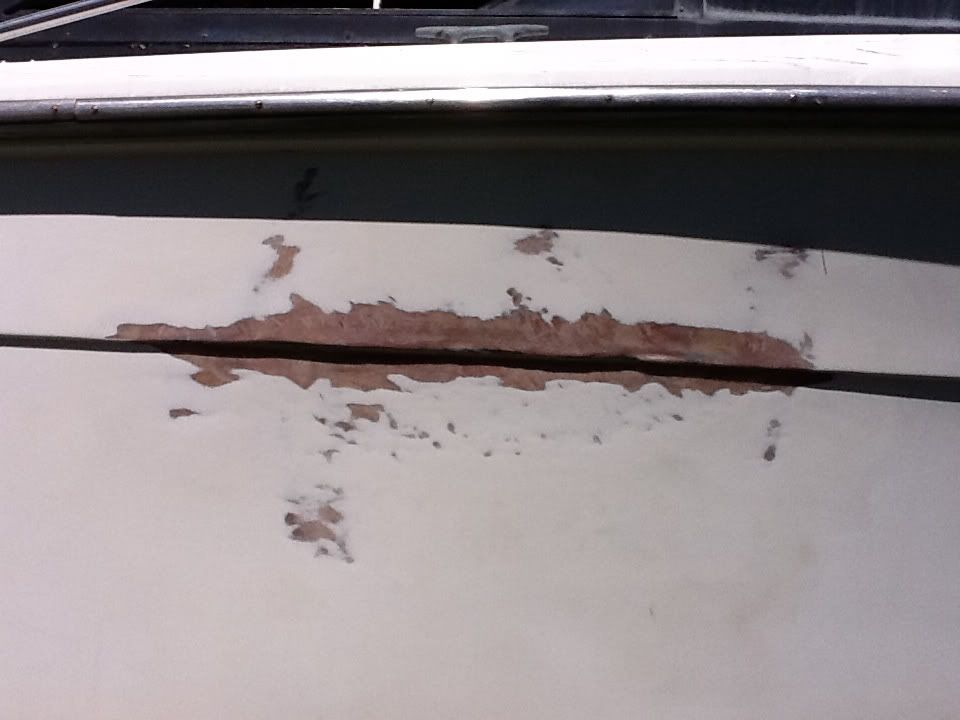
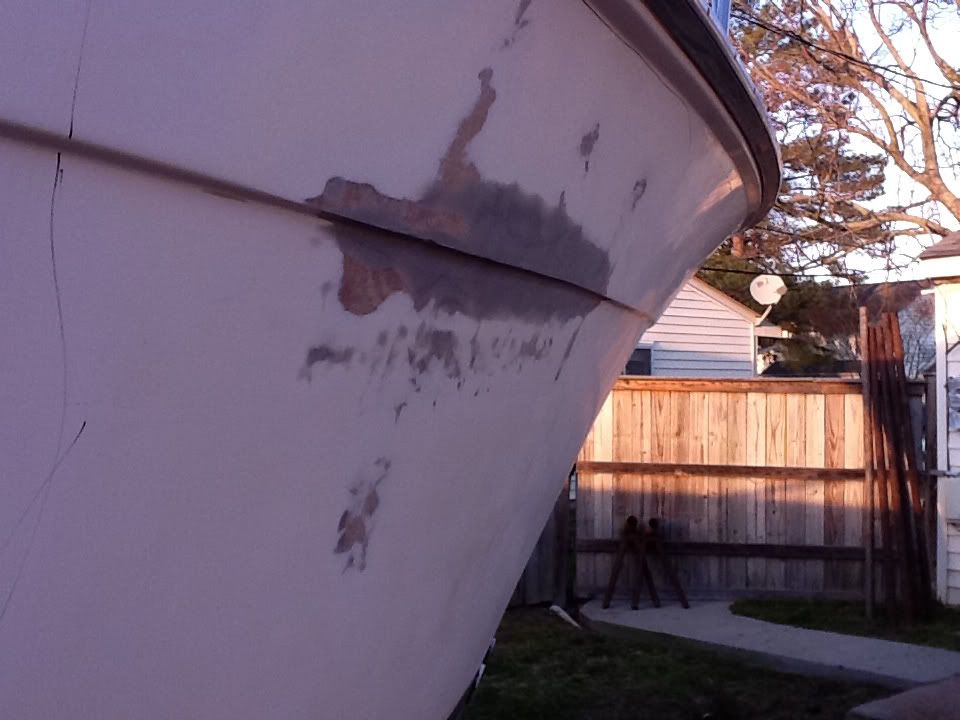
hull damage
Posted: Tue Mar 13, 2012 6:59 am
by jefflaw35
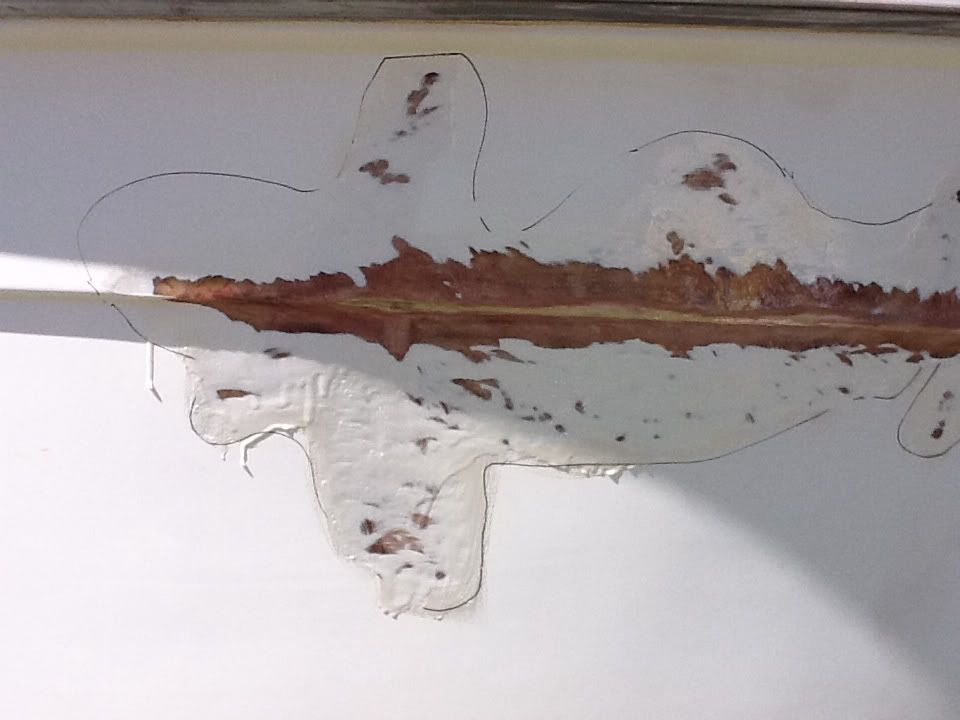
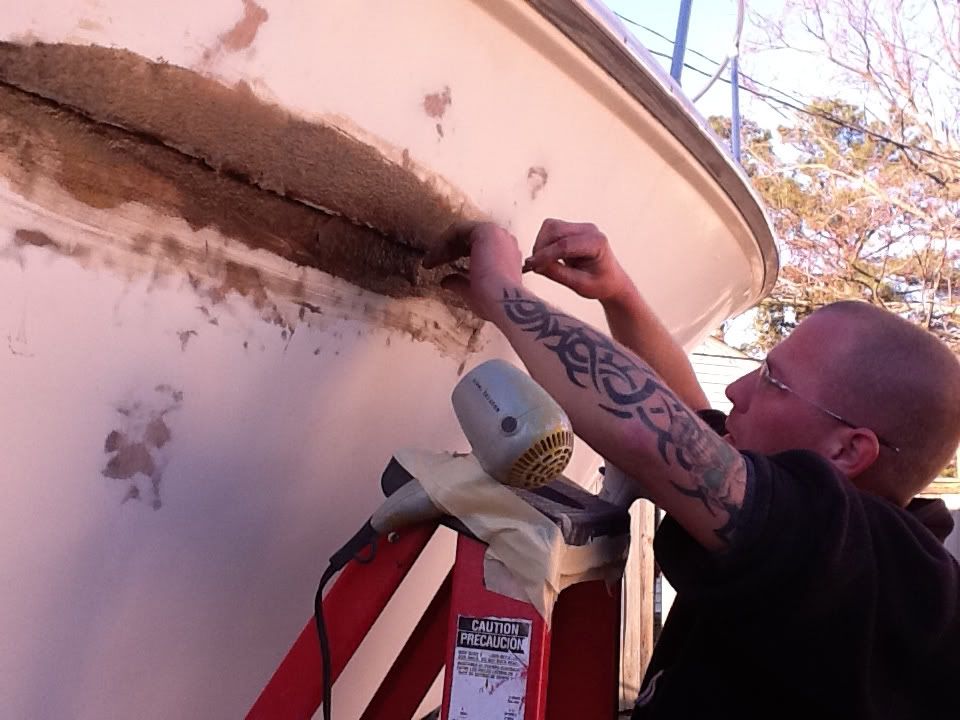
damaged fiberglass hull.

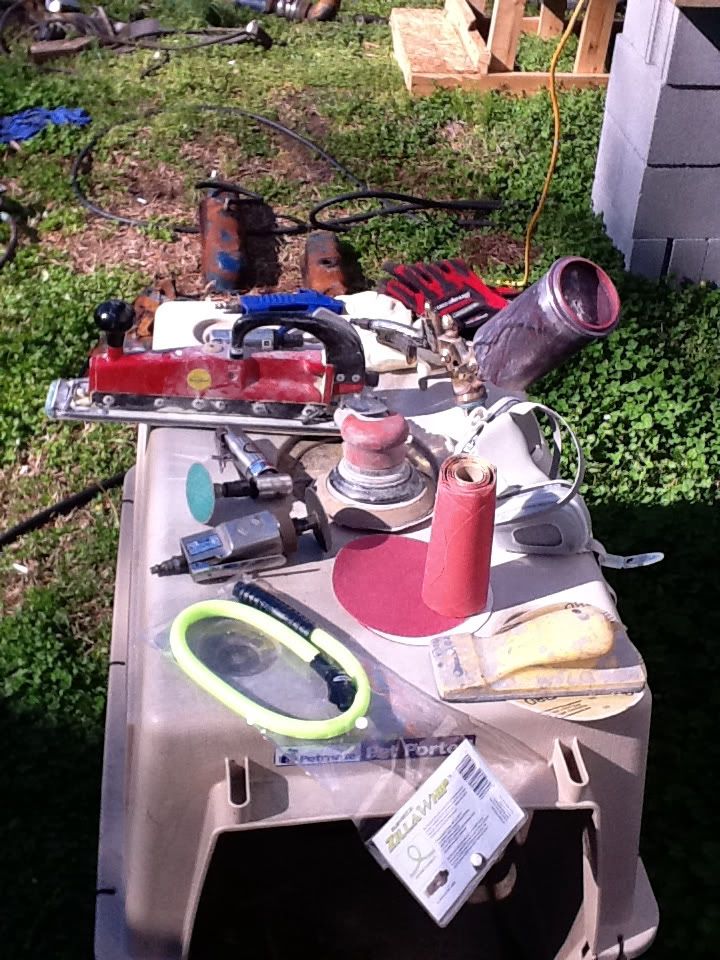
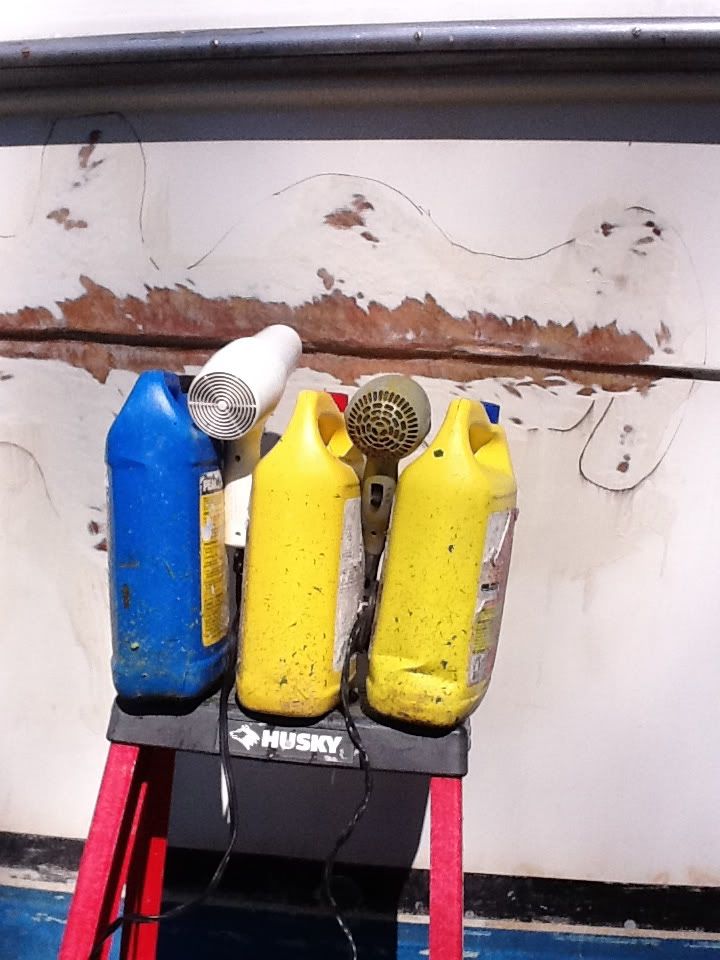
Some of the tools required
Start by grinding out all of stress cracks first as they can be hard to find as the process get more involved
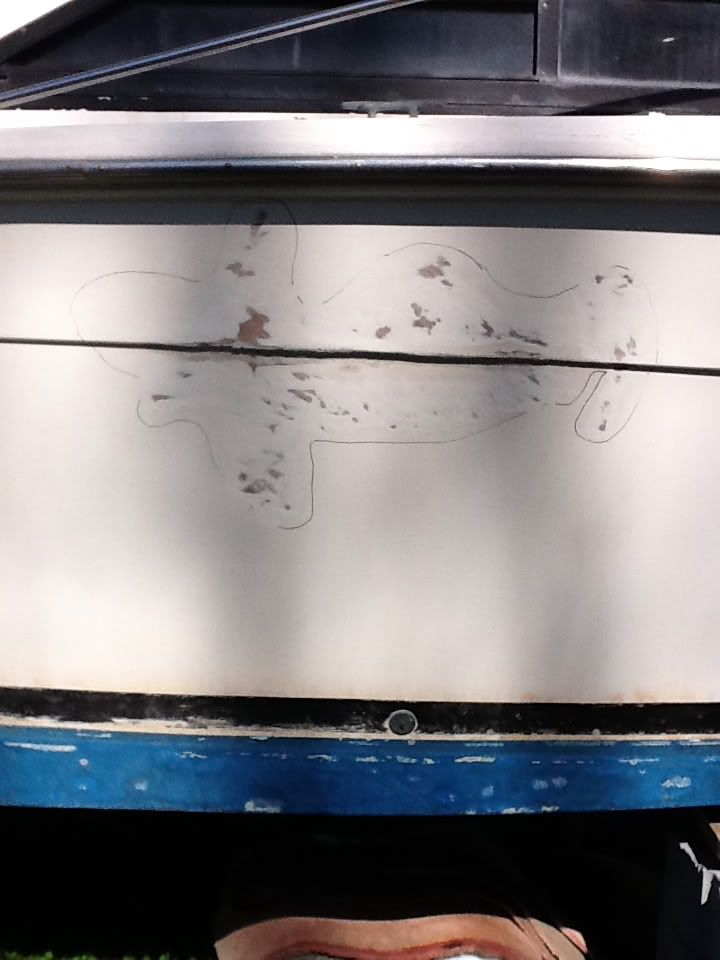
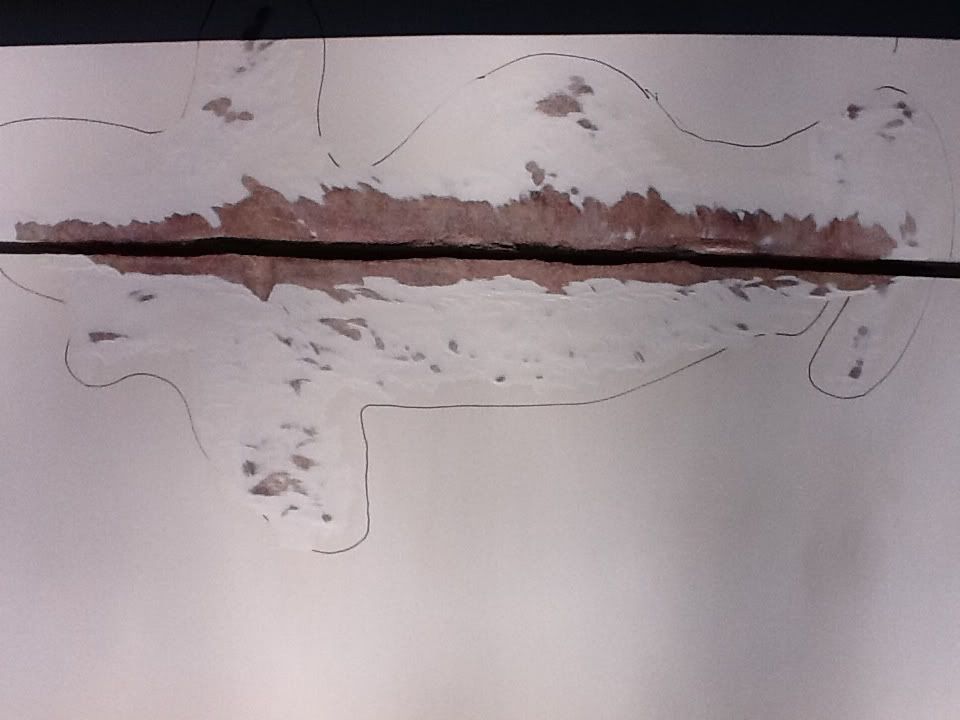
After removing the old repair, which was very poorly done. This is what's left. Next will be to repair the damage inside the boat first so your outer repair will be stronger, that is if the damage was bad enough to penetrate both side as this did.
Inside the cabin
materials

cut out peices before brushing in
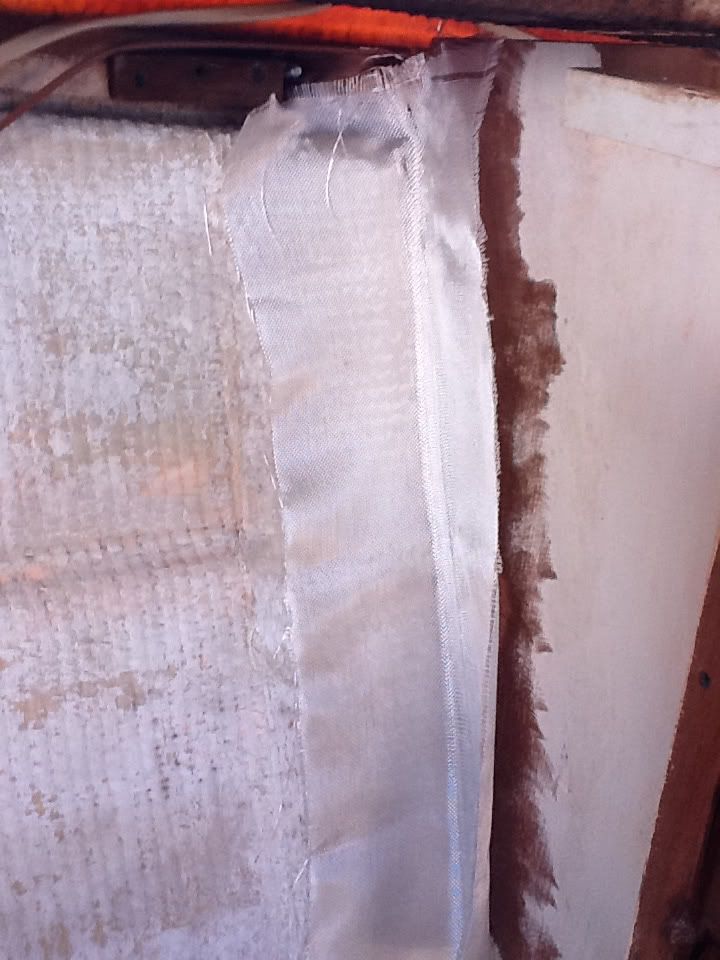
brush in , make sure that the corners are meshed in tight and allow to dry
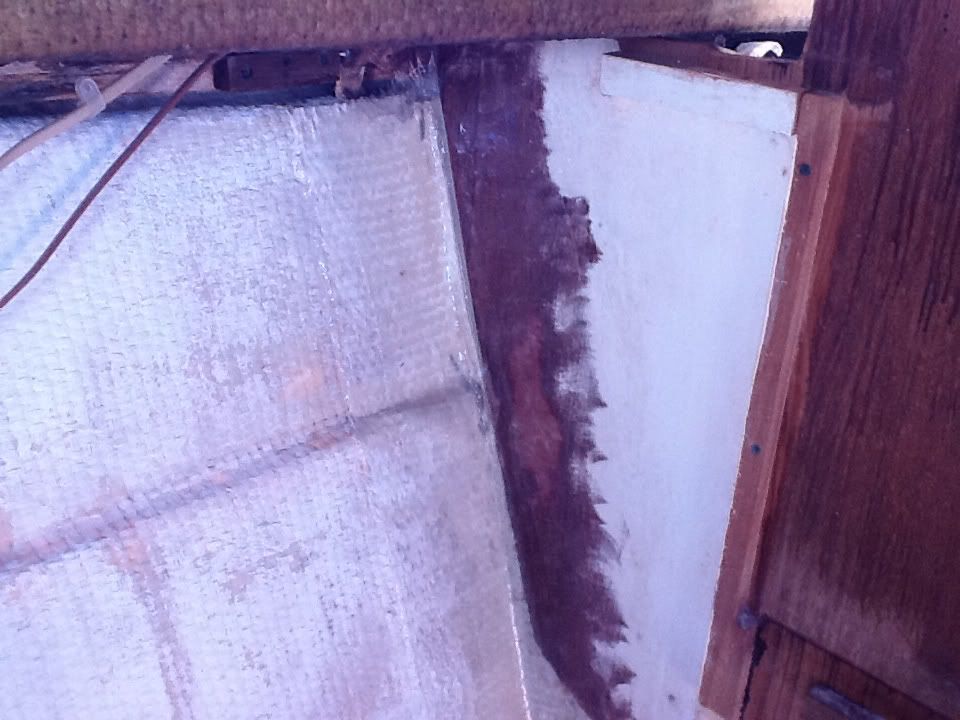
I used left over resin to fill any cracks or holes on the out side before I mesh. It adds a little back bone and uses waste resin. you have to sand this down before you make your repair though.
Ok temps ate under 50 here today again, this resin does not like it, so time for extreme measures
OK ready to go, we have resin all sanded down again, looks like we didnt do anythink but it was worth the wait
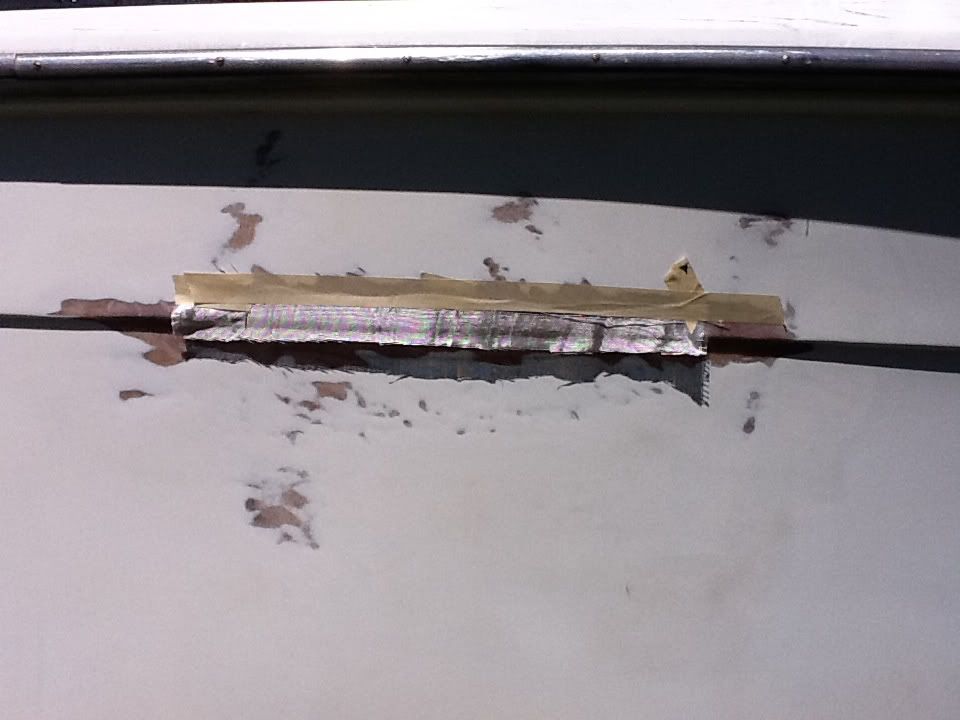
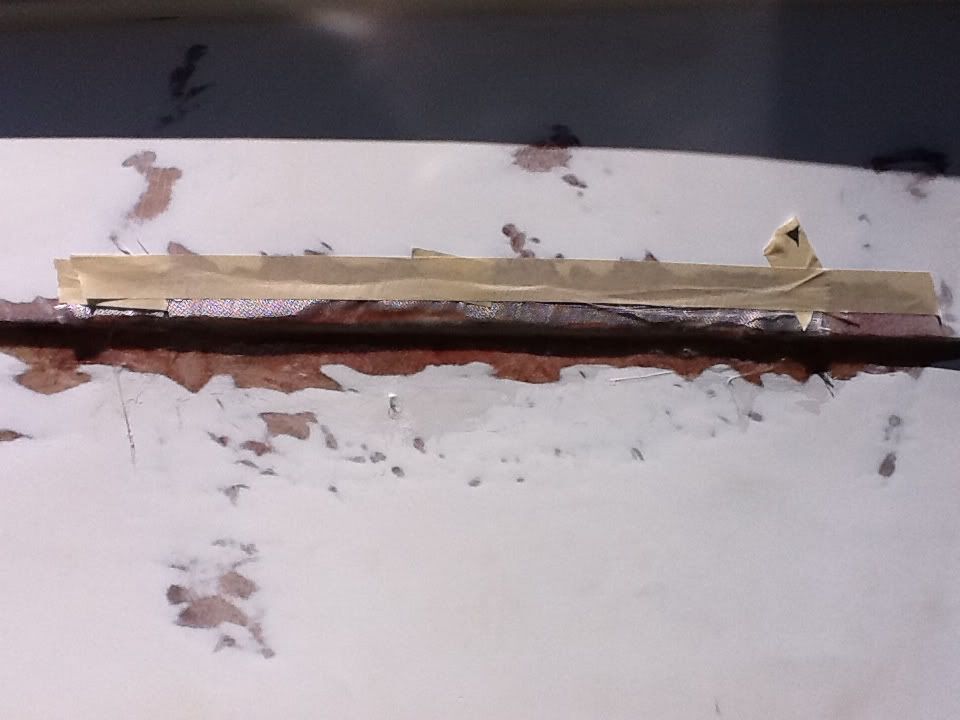
Again cut your mesh peice first, I find it easier to tape it up and start from the bottom
remove tape and finish brushing, this does not have to be pritty just make sure that your mesh is tightly sealed. it likes to move around alot so you have to brush back and forth to make sure it is in the correct place, then use a hard edge to make sure your angles are completly seated, if not when you sand this down the mesh will try to come apart.
Time to wait again, after it is dry we will sand and apply short strand fiberglass

i used long strand glass to top coat
then used an air file to get stright lines
when it warms up ill go back with a lightweight polyester filler to fill in any lower areas, pin holes etc and clean the body line up. Then she is ready to prime
Re: hull damage
Posted: Fri Mar 16, 2012 9:29 pm
by foofer b
[quote="jefflaw35"]
Again cut your mesh peice first, I find it easier to tape it up and start from the bottom
remove tape and finish brushing, this does not have to be pritty just make sure that your mesh is tightly sealed. it likes to move around alot so you have to brush back and forth to make sure it is in the correct place,
]
I have found it is better to Roll on the resin to the surface to be repaired first, then lay your cloth on the wet resin, and the wet out your cloth with the roller bearing down a good deal to thoroughly saturate the cloth and squeeze out excess resin. Using a short napped roller made for solvents is a must.
Posted: Fri Mar 16, 2012 10:04 pm
by prowlersfish
Foofer , I also do it like you but I use a brush instead of a roller .
Re: hull damage
Posted: Fri Mar 16, 2012 11:35 pm
by rbcool
I have found it is better to Roll on the resin to the surface to be repaired first, then lay your cloth on the wet resin, and the wet out your cloth with the roller bearing down a good deal to thoroughly saturate the cloth and squeeze out excess resin. Using a short napped roller made for solvents is a must.[/quote]
+1
A roller is the way to go!! The groved (kinda like a bolt) roller is even better.
Ron