Page 6 of 11
Posted: Sat Apr 17, 2010 9:29 pm
by RWS
You will find the aft bilge pump (1500 gallons per hour) behind the fuel tank, between the tank and the transom.
This bilge covers the area rear from the rear engine bulkhead to the transom.
This area is designed with a full liner.
From the factory, the aft pump sits on top of that liner.
If you ever take the fuel tank out, you may want to modify this feature by creating a small cutout in the liner for a sump.
BEFORE PUTTING THIS BOAT IN THE WATER YOU NEED TO VEIRIFY THAT ALL THREE PUMPS ARE WORKING PROPERLY. THE HOSES ARE IN GOOD CONDITION, HAVE PROPER VENTED LOOPS TO PREVENT SYPHONING AND THAT THE THRU HULLS ARE IN GOOD SHAPE.
MAKE SURE TO DOUBLE CLAMP ANY HOSE THAT IS BELOW THE WATER LINE.
REPLACE ANY BAD HOSES, CLAMPS, PUMPS AND SWITCHES.
A cracked hose or broken clamp could sink your boat overnight at the dock.
RWS
Posted: Sun Apr 18, 2010 8:08 am
by jimbo36
Now that is one expensive wessel

Posted: Sun Apr 18, 2010 9:24 am
by pk
Well....as you know, everything here is expencive. A few dollar more or less...who care? It is not the price, but this boat is worth spending some money on. It is a TROJAN!!

Posted: Sun Apr 18, 2010 9:33 am
by RWS
Once you restore the RELIABILITY factor and the COSMETIC factor, you certainly will have an awesome vessel.
RWS
Posted: Sun Apr 18, 2010 9:41 am
by pk
This week-end I have been busy in the engine room. As you see, there is a lot to do.....
Posted: Sun Apr 18, 2010 9:47 am
by pk
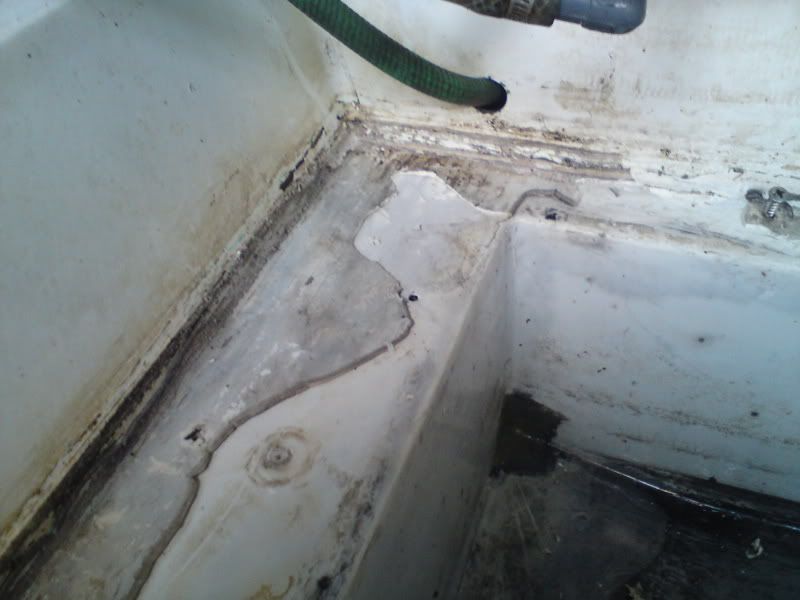
The holding tank was a great job. First washing, rubbing, and at last take away the old silicone seal. Wich was a bit difficult, but with a sharp knife and a bit patient it went well.
Posted: Sun Apr 18, 2010 9:50 am
by pk
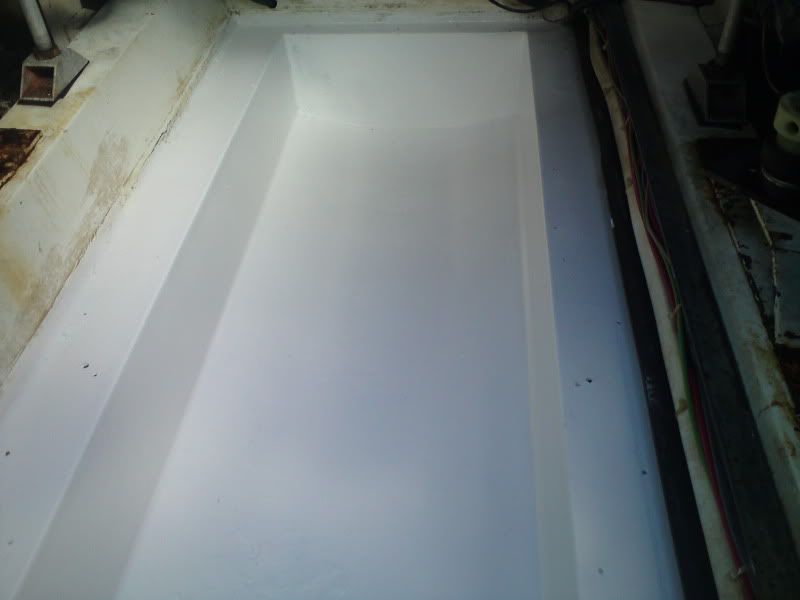
...and the result. Nice??

Posted: Sun Apr 18, 2010 9:57 am
by pk
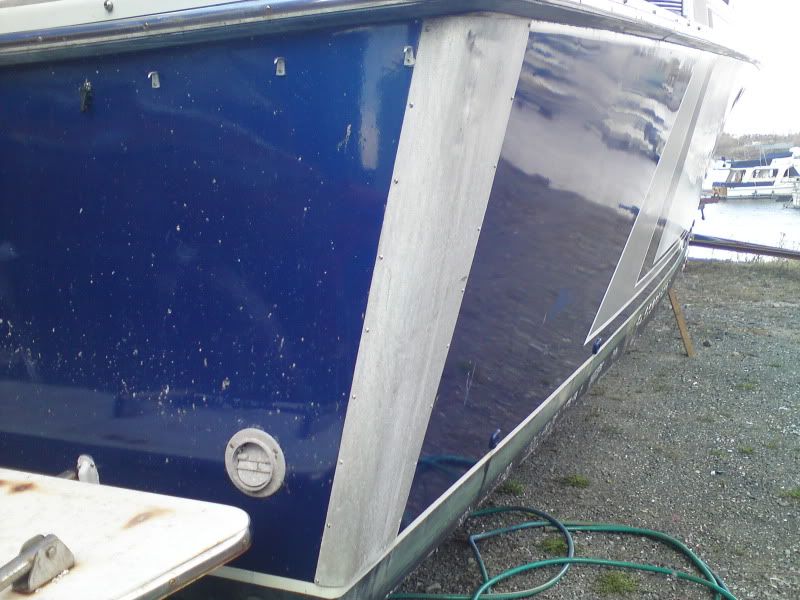
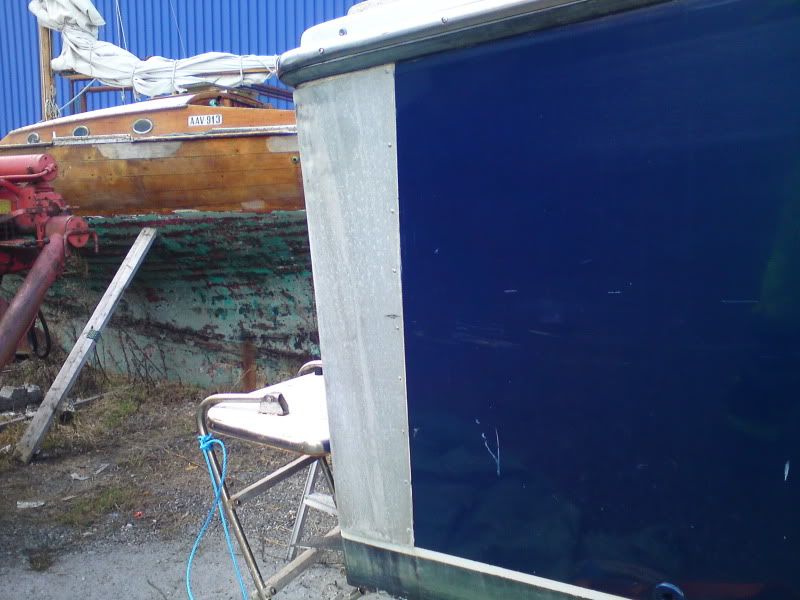
On the corners aft there is steel reinforcements. Is this originally, or is it something the pre-owner have put on?
Posted: Sun Apr 18, 2010 10:25 am
by RWS
PK,
Your holding tank looks really good.
Nice Job!
I have never personally seen the stainless panels on the transom corners. Maybe it was a dress up item, I am not an authority on it.
I noticed that there is a green garden hose coming out of your fwd engine room bulkhead, just above the waste holding tank. This needs to be replaced with the correct hose as that green hose will make your fresh water quite nasty.
Also, when you build the "lid" for the holding tank here's a couple of hints:
1) build a baffel into the middle of the lid. The factory lid has one to reduce the waste from sloshing about to much inside that tank.
2) when you attach the lid use stainless steel fasteners with LARGE FLAT washers. Here we call these "fender" washers. They will help spread the load.
3) the fasteners are attached in a staggered fapattern. Look at the existing holes and you will see what I mean.
4) Do not use silicone to seal that lid. I suggest you use 3M brand 5200 sealant if you are certain that it's a good fit and will never be removed, otherwise use 4200.
5) Whatever sealant you choose to use, be sure to use plenty of it. You don't want the tank leaking into the engine room around the lid.
6) do not overuse formaldyhyde chemical toilet treatments. This was what I did after hurricane Charley when the whole neighborhood was using the Trojan's head to take a crap as we had no running water or operating sewers for some time. Overuse of that chemical softened the seal around the lid, resulting in a bad smell in the engine room and a nasty wetness that took a while to figure out.
7) The only chemical I will put into that head now is baby oil to liubricate the vacuum seal at the bottom of the head and some dishwashing liquid occasionally. I also added a watertight bung to the top of the tank where I will mount (when I get around to it) the tank level monitor. This bung also allows me to put a garden hose down there and really stir things up from time to time.
I also noticed blue paint on your thru hulls at the waterline on the sides of your boat. Some of these 10 Meters had early versions of Maleron fittings here. These early versions were ont UV stable, and over 25+ years of exposure become brittle and crack. If one of these fails it can sink your boat. THey are easy to replace and f you are serious about rerstoring this vessel I would strongly suggest that you replace all of the maleron ones with Bronze and do the attaching hoses while you're at it.
The evidence of the plywood waste tank lid, green garden hose and other less than ideal maintenence issues leads me to believe that youir boat may have suffered from a combination of improper repair and a lack of proper preventative maintenance.
In the best interest of SAFETY and RELIABILITY it would be in your best interest to have a survey done to identify all the systems that require attention.
O.K. I really didn't intend to write this much, but after seeing the photos I figured you could use a bit of friendly advice for what it's worth.
RWS
Posted: Sun Apr 18, 2010 11:05 am
by pk
Oooo...Thanks! It is a good thing that someone take time to explain how to do, and how not to do! As earlier said, I will replace all hoses in her. Last autuum I experienced some of the throug hulls was broken. At least three of them. Therefor I will change all of them with bronse fittings. The same with seawater in- and outlets under waterline and in the bottom, as well as the hoses to them. Tomorrow I will be on work again, so next time I´m in the boat will be on Tuesday afternoon. And I am already looking forward to it...!
Posted: Sat Apr 24, 2010 5:27 pm
by pk
At last; the Week-End is here. And the work on the Trojan ofcourse. Tomorrow I will take loose the engines, clean the engineroom from old debries, slush and oil. It will need a white layer of paint, and at last I will change all the wiring and tubes, bits and bobs. I have found a workshop here in Norway that can repair the windscreen, they promised it ready till next Friday. And on Monday I will inspect a pair oof Mercruiser diesels to repower the Trojan.
I have tried to get a pair of window corner (left and right) for the windscren, but it seems to be nada out there. Is there anyone out there who knows where I can buy a pair of theese windows????
Posted: Mon Apr 26, 2010 11:42 am
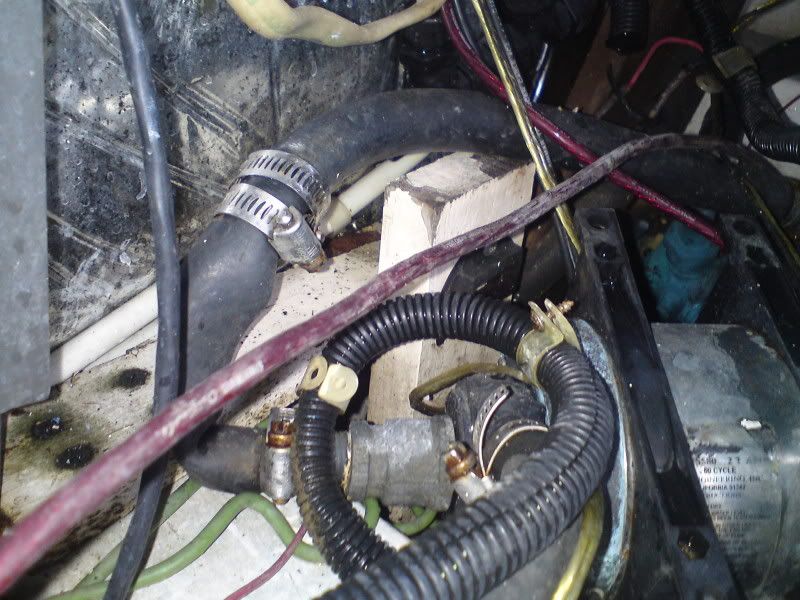
by pk
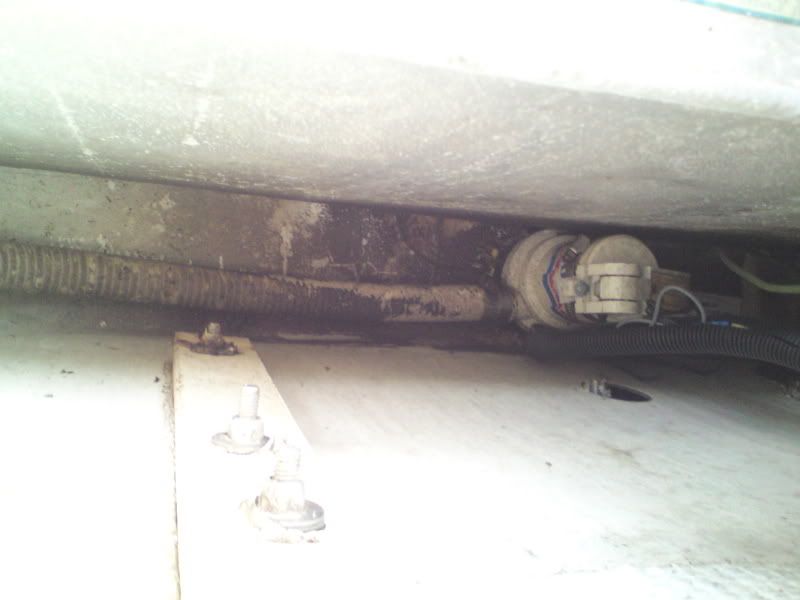
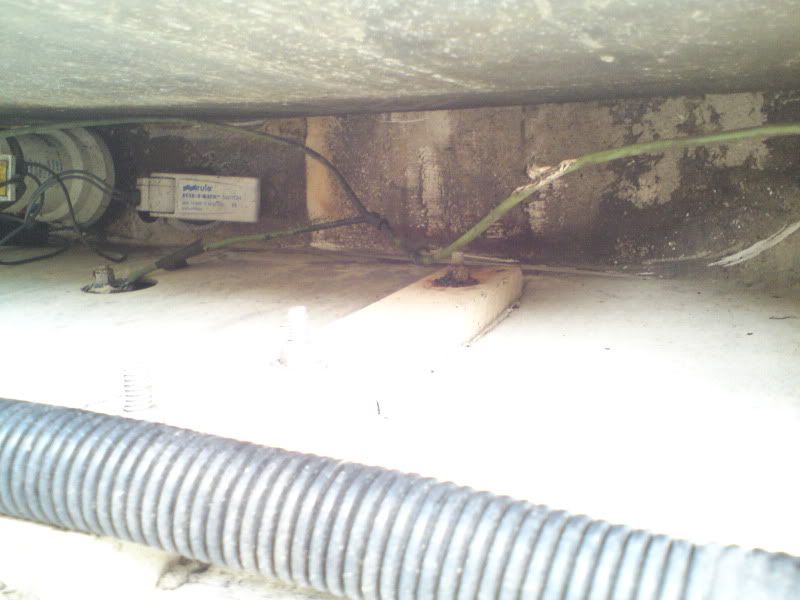
I found the last bilge pump! Lucky umm? Just as they told, behind the fuel tank. I had to use my micro-camera again, just to locate the pump. The sad thing is I have to swap the pump. It does´nt work properly. How the h--- do I enter the bilge? My arms are too big (muscular type
) to enter it.
Posted: Mon Apr 26, 2010 12:46 pm
by pk
I think this one is good enough for use this season. Maybe a pair of new ones next year?
Posted: Mon Apr 26, 2010 8:09 pm
by RWS
PK,
There are three removable "hatches" along your transom.
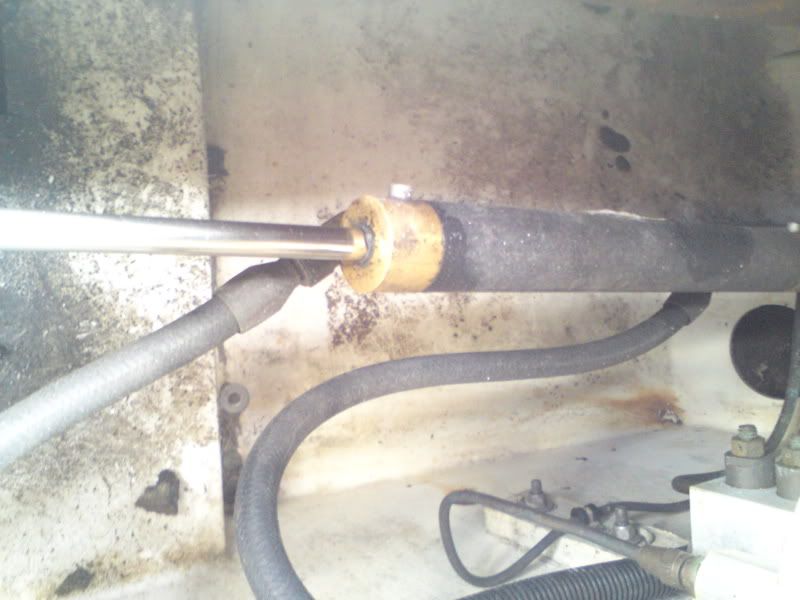
The one on the starboard side is for access to the hydraulic steering, the ram in your last photo.
The other two are storage compartments that are removable to get access to the inside of the transom.
Looking at your photos I am guessing that you have already discovered this feature.
Anyway, you are seeing two bilge pump switches. The lower one is to activate the pump, the higher one is the high water alarm.
There are three bilge pump manual override switches on the 12 volt side of tha panel.
The one on the starboard side is for the rear bilge pump, th emiddle one is for the engine room pump and the starboard switch is for the forward pump.
Try flipping these on to see if any of these pumps are running. Remember, if a pump is not running the pump may be bad, or the switch or wiring may be thge culprit.
ALSO VERY IMPORTANT: MAKE SURE TO USE TOE CORRECT WIRE CONNECTORS AND USE HEAT SHRINK ON EVERY CONNECTION.
Doing this will reduce your failure rate for bad connections to virtually zero.
Ask away with specific questions. We're all glad to see your progress.
ALSO: IF YOU ARE GOING TO REMOVE THE ENGINES, IT WOULD BE A GOOD TIME TO ADD AT LEAST FOUR EXOLOSION PROOF LIGHTS TO THE OUTSIDE AREAS OF THE ENGINE ROOM.
RWS
Posted: Tue Apr 27, 2010 12:20 am
by captainmaniac
pk wrote:How the h--- do I enter the bilge? My arms are too big (muscular type
) to enter it.
Looks like fun, and reminds me of my Liberator - a 26' offshore with twin 350 Magnum Mercruisers. 8' beam, two engines side by side, 4" pipes straight back for the transom exhaust, and the bloody bilge pump in the deepest part of the keel, right at the transom... 16" between the engines, with the pump over 4' below the straight pipes... Such fun to get to it !!! Basically twist sideways and do a handstand between the engines, work with one hand while the weight is on the other, then try to find a way to get the &*%$&^$^ back out of there when done !!!
Loved that boat - could hit 65 and flew well too! But "someone" (read "wife") insisted on switching to something where she could actually stand up inside... She got fed up with the 4' cabin headroom and porta-potty.