Page 1 of 3
F32 Parts available
Posted: Thu Apr 29, 2010 11:20 pm
by ready123
Posted: Fri Apr 30, 2010 7:46 am
by Stripermann2
I'm interested in the hatches. Will pm you later. Thanks.
Posted: Fri Apr 30, 2010 8:16 am
by Tuck
damnit...again, i can't view from work.
i'll have to break out the android in a few...
Posted: Fri Apr 30, 2010 9:32 am
by Tuck
ready, i haveth sent thee an email.
Posted: Fri Apr 30, 2010 8:24 pm
by Nancy
Michael,
I'd love to hear what you're replacing the aft rail, hatches, anchor light, and FB seats with. Sounds like a bunch of projects!
Nancy
Posted: Fri Apr 30, 2010 8:30 pm
by captainmaniac
I had been thinking about one of the hatches as a 'spare' just in case... let me know if Stripermann doesn't end up taking 'em.
Posted: Fri Apr 30, 2010 9:28 pm
by ready123
Nancy wrote:Michael,
I'd love to hear what you're replacing the aft rail, hatches, anchor light, and FB seats with. Sounds like a bunch of projects! Nancy
No aft rail, filled the holes and now have transom seating.

Hatches have been replaced with smoked glass and black wood from a buddy's F32 as he went to modern Ally hatches.
Anchor light is straight without the V tie-bar.
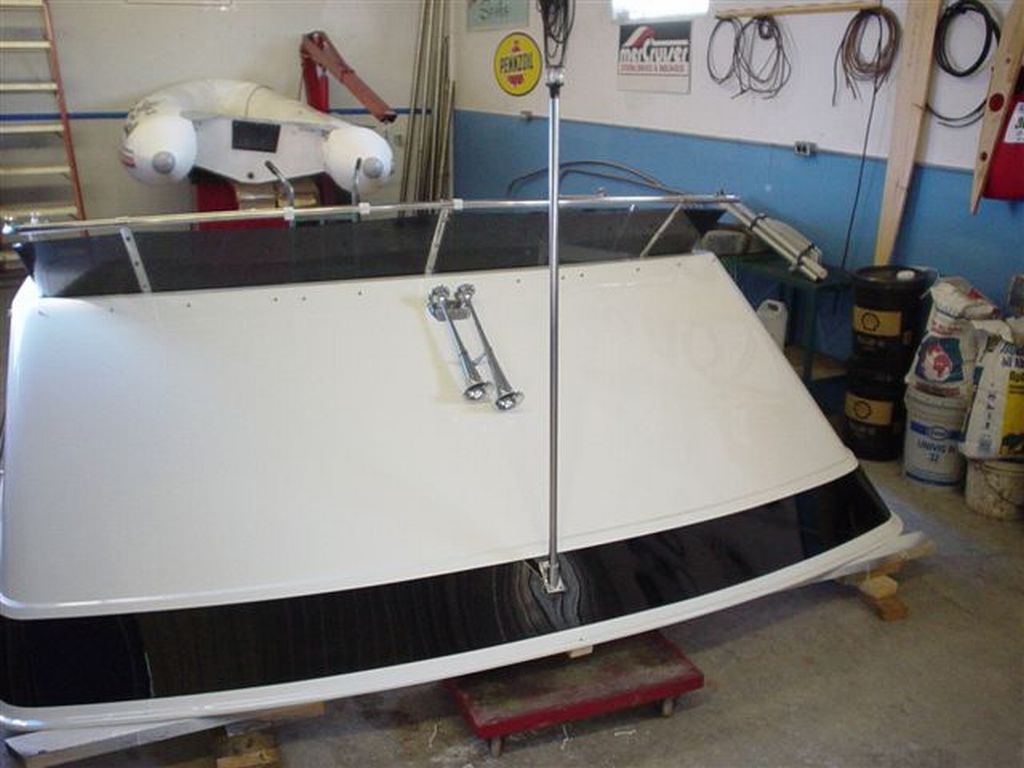
Bridge seating is a bench with storage inside (homemade, professionally covered) full width of console.
Are you still an F32 owner Nancy?
Posted: Sat May 01, 2010 9:21 pm
by Nancy
Michael,
That all looks great! Have fun putting the flybridge apron back on! Are you filling the screw holes with epoxy first and then re-drilling?
Yes, we still have the F32, and she's still for sale. We had a full bridge cover fabricated for her last summer, and I've taken the cockpit rails down to bare wood and am re-doing the Cetol. Engines are running great.
Nancy
Posted: Sat May 01, 2010 9:33 pm
by ready123
Nancy wrote:Michael,That all looks great! Have fun putting the flybridge apron back on! Are you filling the screw holes with epoxy first and then re-drilling?
Yes, we still have the F32, and she's still for sale. We had a full bridge cover fabricated for her last summer, and I've taken the cockpit rails down to bare wood and am re-doing the Cetol. Engines are running great. Nancy
Ah so the new bridge cover is so you don't have to reduce the price as she is another year older.

No need to do that with the holes as:
the reason the apron was off was because I was repairing wet spots in the bridge floor..... most of which were along the sides and along the aft section.... so it has already been filled with 3/4" marine ply blocks coated in resin and shoved into the cavities left behind after the wet & missing balsa was removed from each layer... yes some of the second layer was also wet, I was quite surprised to find some quite large voids where the balsa had just turned into soup and disappeared without a trace

Oooh tell me more about the bridge cover, any pictures? Does it have to go around the fittings for the bimini which are connected to the top rail around the windshield if it is like my top? That is the one thing I lack as mine does not fit well unless the bimini is completely removed... a state that is only at either end of the season.
Posted: Sun May 02, 2010 7:03 pm
by rooferdave
will those hatches fit on my trifly? one of mine is missing and one is shot, actually the missing cover I think is a fixed cover. I have a leak in the front of my cabin and I was wondering if it could be where the bridge you have removed fastens to the cabin roof, should it be caulked?
Posted: Sun May 02, 2010 7:42 pm
by Nancy
Michael,
As you know, pricing these boats is like playing darts! Too high and it doesn't sell. Too low and prospects think there's something horribly wrong.
I haven't got pics yet of the bridge cover, but will soon, and I'll post. It does goes around the fittings for the bimini. The bimini has to be deployed for the cover to fit well. I knew this would be a compromise. I'm not sure yet how or whether it will work if the bimini is folded aft.
The other compromise is that we have Sunbrella aprons which fasten to the FB rails and provide the illusion of a "wall". To avoid yet another row of snaps in the FB apron (hmm, too many aprons here...hope you're not confused yet), the Sunbrella has to be unsnapped when the bridge cover is put on.
Do you have any pics of your FB repair? What size blocks did you put in the void? Did you piece them in to form a mostly solid surface? As for the voids you found, those may have been there from the get-go. John at Marine Tech told me that the FB sole was fabricated like two big pots and then put together with one right side up and the other reversed.
Nancy
Bridge floor repair detailed
Posted: Sun May 02, 2010 10:06 pm
by ready123
Nancy wrote:Michael, I haven't got pics yet of the bridge cover, but will soon, and I'll post. It does goes around the fittings for the bimini. The bimini has to be deployed for the cover to fit well. I knew this would be a compromise. I'm not sure yet how or whether it will work if the bimini is folded aft.
The other compromise is that we have Sunbrella aprons which fasten to the FB rails and provide the illusion of a "wall". To avoid yet another row of snaps in the FB apron (hmm, too many aprons here...hope you're not confused yet), the Sunbrella has to be unsnapped when the bridge cover is put on.
Do you have any pics of your FB repair? What size blocks did you put in the void? Did you piece them in to form a mostly solid surface? As for the voids you found, those may have been there from the get-go. John at Marine Tech told me that the FB sole was fabricated like two big pots and then put together with one right side up and the other reversed.
Nancy
Sorry like a goof I didn't take any pictures... not sure they would really be of any help to anyone as the work was done out of view through access holes.
The voids I'm talking about is within each layer John speaks of... when I say voids I should have said spaces because I'm talking about 6"x8" areas or more of nothing. Anyone who has brown drip stains coming from above (inside or outside the salon) this is the balsa rotting away to nothing!
The construction below the outer skin is a 3/4" balsa layer above a 1/8" fibreglass membrane below which is another 3/4" balsa layer ontop of another thick fibreglass membrane. Below that final membrane is an air gap to the cabin roof in some places as the bridge sits on metal (ally) crossbraces I think.
If anyone might be interested I will explain the bridge floor repair process we used.
1) we sounded the floor to check for wet and delaminated spots. Once those were mapped we then drilled 1/4" test holes to see if the balsa was wet, absent or dry, single layer or double layer.
2) the wet areas were mapped and then we cut access holes say 1' by 1 1/2' in suitable areas. For me it was at top of ladder and the aft starboard corner and centre aft locations.
3) threaded wire rods with a bend on the end were used to pull out any damp balsa. The ladder side hole went a good 3' forward along the port side. This was done on each of the two layers.
4) 3/4" marine ply was cut into 2" sq blocks and also some odd shaped smaller blocks and triangle pieces. Another homemade tool which was a 1/8" by 1" strip flexible steel 5 foot long with a |_| shaped metal end 1/2" high welded on it to hold the 2" sq blocks and push them into place.
5) a bucket of resin was mixed to fully coat the blocks before they were pushed in to fill the spaces that had been cleaned out. We tried to fill the area as completely as we could using the variety of shapes.
6) glass was placed between each layer at the access holes after the resin was poured on the blocks to fill all spaces.
7) the original gel/glass piece that had been cut out was replaced and gel coat was put into the gap created by the original saw cut. Gel was also place on the top of all the test holes after they had been filled with epoxy.

a good portion of this work will be hidden/covered by the side panels, the new bench seat and a non skid patch that will be glued at the top of the ladder.... so I have not worried too much about trying to match the gel colour nor the non skid pattern.
The above process was surprisingly easy and complete in my opinion.... I had been quoted several thousand dollars by two professional shops to do the work using their method of cutting the two layers out and replacing with new balsa and then glassing and gelling it back to original. The plywood I had and the materials consumed were less than $300.
I'm happy with the money I saved and consider if the pro's had done what they quoted it would have been overkill as they would have been replacing dry balsa.
We spent two days removing wet balsa in the fall and letting it dry out over the winter and three days filling the holes and replacing the patches -2 guys.... I don't see how the pros can justify $7-8K for the repair.
<rant>Moisture meters are for padding the damage for pro quotes.</rant>
Posted: Sun May 02, 2010 11:39 pm
by Nancy
Did you lift the helm console, too? How about the railing stanchions?
Posted: Mon May 03, 2010 4:06 am
by ready123
Nancy wrote:Did you lift the helm console, too? How about the railing stanchions?
Helm console sounded out fine, 2 delaminated spots ahead of it though which were injected with epoxy... all stanchions were removed and some were above the aft wet patches so will have to be re drilled on replacement, the original holes still exist in the top surface.
The J rail has been replaced after filling the space behind it with 5200. I have drilled the over hang along the port & starboard sides of the bridge and installed 6 1" vents, will have photos at completion after launch.
The bridge surround and railings will go back on after she splashes on the 11th.
Hey that's not much more than a week away.

Posted: Mon May 03, 2010 10:12 am
by Nancy
Do you think there's any water getting in where the helm console fastens to the sole?
Will look forward to the vent photos. Are those overhangs hollow?
Have fun re-drilling those holes for the stanchions...it's a bear to get them anywhere near straight.