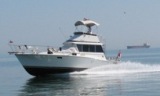
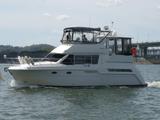
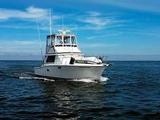
F32 Gauges
Moderators: BeaconMarineBob, Moderator, BeaconMarineDon
F32 Gauges
Looking for opinions--have an 81 f32 with dual stations-- original gauges--know that the gauges are not accurate--I think---do gauges wear out----would replacing senders help-- if new gauges are needed have to rewire all--or should i not look for problems--Thanks---boat on hard ground for winter
-
captainmaniac
- 2025 Gold Support

- Posts: 1922
- Joined: Sat Apr 30, 2005 10:26 pm
- Location: Burlington, Ontario
Gauges and senders need to be matched up. I replaced the gauges on my F32 (a '79 model) a while ago when some of the old DetMars stopped working reliably, and I wanted a fully matched set so did everything in both stations. I have twin Chrysler 360s, so if you have Mercs you might need something different.
I used Teleflex Red International gauges - completely compatible with the old stuff. Had to change one of the wiring harnesses (can't remember if it was for the ground or power to lighting that was daisychained around all instruments) as old gauges used ring connectors and new ones used spade (or vice versa), but other than that no issues.
If you do replace senders make sure you are getting the right ones -- there are different senders for dual station vs single station configurations (ie having one gauge or 2 hanging off of it). Don't think I have had to do a sender yet, and I have had the boat for 12 years.
my 78 f32 had black and white ac guages not sure what the 81 has but these (see link) were the closest to the originals i have been able to find. these area also black and white and a very close match i think.
http://marineengineparts.com/shopsite_s ... ge520.html
http://marineengineparts.com/shopsite_s ... ge520.html
1997 CARVER 405
"the BLACK PEARL"
past fleet
1978 F32 SEDAN CHRYSLER 318's
current fleet
1997 seadoo gts
1997 yamaha wave venture
1985 sunbird 18 ft runabout
1968 coronado sailboat 25 ft
sunfish
14' hobie cat
canoe
8ft portabote
"the BLACK PEARL"
past fleet
1978 F32 SEDAN CHRYSLER 318's
current fleet
1997 seadoo gts
1997 yamaha wave venture
1985 sunbird 18 ft runabout
1968 coronado sailboat 25 ft
sunfish
14' hobie cat
canoe
8ft portabote
f32 gauges
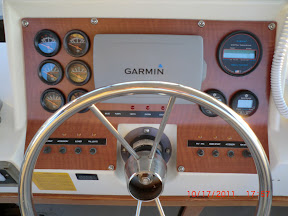
Mel--that topside looks great--can you explain the replacement--what material used--did not see RPM gauges for each engine--what year is year is your Trojan--topside similar to mine which is a 81
Thanks
Thanks
The visible part was quite simple.
You're looking a piece of plastic laminate (Wilson Art if I remember). I went by a nearby cabinet shop where they let me look in their scrap bin - I picked this out and they gave it to me. Then I epoxied a piece of luan (1/4") to the back. After that dried, I removed about an inch wide strip of the luan from where the "crease" had to go ( all the way across the width of it). I cut it to fit using the old faceplate as a template. Making the bend was scary as I didn't know how to do it and the p-lam isn't really made to do this. So I took the "Tim the Tool Man" approach and took my heat gun to it. It took about 2 hours to soften it and flex it - but it did work! On the left side are the electric, oil and water guages. The right side, top guage is an LCD dual reading tach. The lower guages are flow meters. I also replaced the indicator lights with LED's from Radio Shack ($2 apiec) and much easier on the eyes. The switch labels used to light from the backside but I did away with that, as there's plenty of light from the other devices.
The toughest part was rerouting the cabeling. That alone took almost all day. Actually the real problem was the longer it took the more Heineken it required!
Mel Spruill
Molly Too
'87 F32
Molly Too
'87 F32
-
prowlersfish
- 2025 Gold Support
- Posts: 12731
- Joined: Sat Nov 05, 2005 6:56 pm
- Location: Lower Chesapeake Bay ,Va