There a couple of ways to blend in the non skid and keep it original looking. Here is a link that should give you one of the many options, I have a person at the lake with a Carver that has the problem on his swim platform and this is what the Marina is doing.
http://www.masepoxies.com//Videos/NON_SKID_REPAIR.html
Recoring Front Deck
Moderators: BeaconMarineBob, Moderator, BeaconMarineDon
-
willietrojan
- Moderate User
- Posts: 450
- Joined: Fri Mar 18, 2005 1:24 pm
- Location: Spanish Fort, Alabama


-
aaronbocknek

- Ultimate User
- Posts: 2080
- Joined: Fri Sep 12, 2008 8:19 am
- Location: baltimore, md (alexandria, va and middle river,md) PARKSIDE MARINA
the design a deck website is as follows...
http://www.4designadeck.com a gentleman a few slips away from me has a 1975 f-32 and redid the aft deck with this prouct this past winter. it looks amazing and i am thinking of doing something like that. btw, his wife is ill and has it up for sale so if any one in the middle river area of baltimore is interested, i can give you his information. he takes such pride in that boat, and i know it's breaking his heart to put her up for sale.
aaron
-
Danny Bailey
- Moderate User
- Posts: 478
- Joined: Thu Dec 29, 2005 10:44 pm
- Location: Oriental, NC
Nice looking job, Gerry. I recored the foredeck on my 1980 F-36 but did it a little differently. I cut holes with a hole saw the size of a caulking tube, dug out all the balsa wood, mixed polyester resin with thickeners and ground strand to peanut butter consistency, and pumped the void full. I did about 2 sq ft at a time so the thinner, bottom layer of glass didn't get all floppy. It has held up for three years now, and there is NO balsa wood in the foredeck, all solid glass.
1980 F-36 with 6BTA 250 Cummins enjoying the Sounds and coastal waters of North Carolina
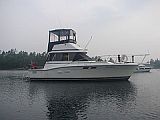
Sea breeze has seen the light of day.
Today I removed the shrink wrap. The boat sure looks better now that I can see it. While I was working on the glass work I opened the front hatch and put a 20" box fan over it and exausted the dust and fumes from the state room. It really dusted the boat. After a washing, I installed the cleats, anchor line deck plate, and rebedded the front hatch. It will require another washing, but that can wait until I get to the harbor. Still need to wash and wax the hull, paint the bottom, and de-winterize before the launch on Wednesday 6/3/09.
Today I removed the shrink wrap. The boat sure looks better now that I can see it. While I was working on the glass work I opened the front hatch and put a 20" box fan over it and exausted the dust and fumes from the state room. It really dusted the boat. After a washing, I installed the cleats, anchor line deck plate, and rebedded the front hatch. It will require another washing, but that can wait until I get to the harbor. Still need to wash and wax the hull, paint the bottom, and de-winterize before the launch on Wednesday 6/3/09.
Last edited by gjrylands on Sat May 30, 2009 9:35 am, edited 1 time in total.
Gerry
1979 F36 Twin Chryler 440's

1979 F36 Twin Chryler 440's
-
Danny Bailey
- Moderate User
- Posts: 478
- Joined: Thu Dec 29, 2005 10:44 pm
- Location: Oriental, NC
I did it from the bottom. Drill the holes with a hole saw sized so that a empty caulking tube just fits the hole. Wrap duck tape around the tube leaving 1/2 inch of the tube end bare. This will make a seal when you shove it in the hole. Cut the nozzle end out of the tube. Save the caulking tube plunger when you clean the caulking out of it and attach a short wooden handle so you can work it by hand. Pack the tube, with plunger in the bottom, with your resin mix, stick it in the hole, shove the handle, and thbbbbt it packs it in there just like a sausage stuffer.
1980 F-36 with 6BTA 250 Cummins enjoying the Sounds and coastal waters of North Carolina
-
captainrob1985
- Registered user
- Posts: 26
- Joined: Sat Jun 06, 2009 12:48 am
wood decks to fiberglass?
I will be refinishing all my decks cause they are rotten and is it possible once they are pulled up to use marine ply and then fiberglass them and still get a good looking water tight boat afterwards? or will the flexing on the water afterwards crack everything?, the boat is a 1974 with the fiberglass hull, would i just be able to tie into that with fiberglass and still mahe a safe strong surface to walk on? i plan on following the directions in these posts but i want to get away from the wood decks. Thank you for your time
Rob
Rob
-
ready123
- Ultimate User
- Posts: 1841
- Joined: Sat Nov 08, 2008 5:53 pm
- Location: Mactier, Ontario Canada
- Contact:
Not sure what boat you have.... only comment I will make is if your deck span is wide I would not go the ply route. You need rigidity in the vertical plane of the deck, why crosscut balsa was originally used. There are modern synthetic/plastic core materials that can be used but I believe that balsa is still the best/cheapest way to go. Also the ply will add weight as it is heavier than balsa.
I have also found that ply can begin to squeak after a while when not fully supported from below.
No need to fear wood cores, just make sure you surround them with epoxy during the install and then ensure that any future piercing of the wood core is done corrrectly to prevent water ingress.
I have also found that ply can begin to squeak after a while when not fully supported from below.
No need to fear wood cores, just make sure you surround them with epoxy during the install and then ensure that any future piercing of the wood core is done corrrectly to prevent water ingress.
Michael
Rum is the reason Pirate's have never ruled the world
Done Dreamin'
1987 President 43' Twin Lehman 225SP Turbo
Highfield 310 Ally 15 HP Yamaha 2cycle
1978 F32 Sedan twin 318 Chry SOLD
Safe Cove Marina, Port Charlotte, FL
Rum is the reason Pirate's have never ruled the world
Done Dreamin'
1987 President 43' Twin Lehman 225SP Turbo
Highfield 310 Ally 15 HP Yamaha 2cycle
1978 F32 Sedan twin 318 Chry SOLD
Safe Cove Marina, Port Charlotte, FL
-
captainrob1985
- Registered user
- Posts: 26
- Joined: Sat Jun 06, 2009 12:48 am
type of boat
Paul (prowlersfish) on the forums has helped me determine that my boat is a 1974 31` sea raider with flybridge (apparently a rare option). i am afraid to do these decks as i have never replaced one before but i can always post on here if i run into a snag. Thank you all in advance for your help lol.
Rob
Rob
-
Danny Bailey
- Moderate User
- Posts: 478
- Joined: Thu Dec 29, 2005 10:44 pm
- Location: Oriental, NC
I did the holes from the bottom because: 1. It leaves the upper layers (the part you will see) intact. 2. The upper layers are thicker and will hold the contour better once the balsa is removed. The bottom layer is very thin and almost floppy once you dig the balsa out. I would drill, dig out, let dry and then fill with f/g mush about 20 - 30 holes at a time. The holes were about 2" in diameter and about 3 1/2" apart. You want them close enough so you can dig out the balsa wood with a bent screwdriver. I had pictures of all this work, but my hard drive died and I lost them.
1980 F-36 with 6BTA 250 Cummins enjoying the Sounds and coastal waters of North Carolina
-
JuiceClark
- Moderate User
- Posts: 388
- Joined: Tue May 02, 2006 10:20 am
- Location: Fort Myers, FL
I'm prone to exaggeration...but I'm not kidding when I say instead of using a "bent screwdriver" on my flybridge deck's rotten coring I used a shovel! I cut that skin off of there and scraped that rotten crud outta there until my back was aching. That was the hardest part though because I had a pro do the rebuilding.Danny Bailey wrote:I did the holes from the bottom because: 1. It leaves the upper layers (the part you will see) intact. 2. The upper layers are thicker and will hold the contour better once the balsa is removed. The bottom layer is very thin and almost floppy once you dig the balsa out. I would drill, dig out, let dry and then fill with f/g mush about 20 - 30 holes at a time. The holes were about 2" in diameter and about 3 1/2" apart. You want them close enough so you can dig out the balsa wood with a bent screwdriver. I had pictures of all this work, but my hard drive died and I lost them.
-
Danny Bailey
- Moderate User
- Posts: 478
- Joined: Thu Dec 29, 2005 10:44 pm
- Location: Oriental, NC