I am going to be tackling this soon on my project boat. I am wondering who has done this, and how?
who has pics?
I have read somewhere that F-32 has 2 roofs, with an air space in between. is this something that is relativity easy to remove and work from the inside out?
I know that common practice would be to cut and remove the outer skin and work down. I have some settling and waves I want to work out in the fly bridge floor.
Tom
who has repaired an F-32 soft bridge?
Moderators: BeaconMarineBob, Moderator, BeaconMarineDon
-
ready123
- Ultimate User
- Posts: 1841
- Joined: Sat Nov 08, 2008 5:53 pm
- Location: Mactier, Ontario Canada
- Contact:
Only way to do it effectively is from the top. I concluded bridge floor was not easy to remove from cabin roof. I removed bridge surround to make access to edge damage easier.
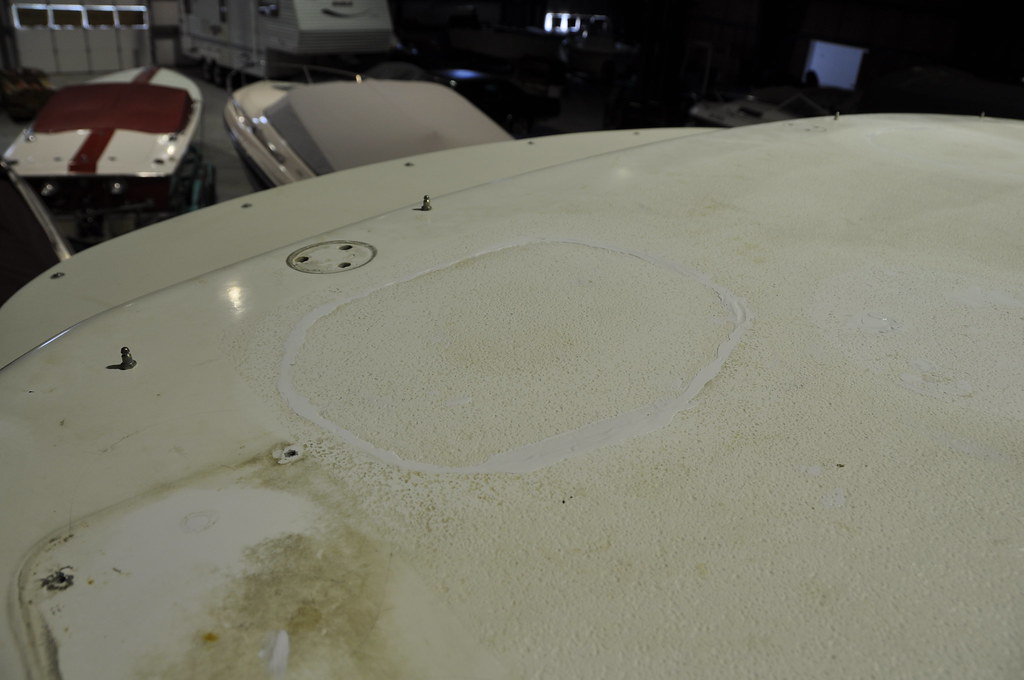
Possible to cut out sections and replace the skin to save anti skid finish....
Note bridge is two layers of crosscut balsa with glass layer in between.
If the wet sections are relatively small I would do it in sections.... if large then cut top skin off and do it as whole open area.
I did sample core drilling to see if I had single layer or double layer damage.
Then cut holes and dug out wet balsa and replaced core by pushing small blocks of epoxy wetted marine ply into the space. I had some two layer damage... if it had been large areas I would have removed top skin and used balsa.
Sorry no pictures of work in progress,
Only finished shots:
http://www.flickr.com/photos/trojanf32/ ... 586940738/
Michael
Rum is the reason Pirate's have never ruled the world
Done Dreamin'
1987 President 43' Twin Lehman 225SP Turbo
Highfield 310 Ally 15 HP Yamaha 2cycle
1978 F32 Sedan twin 318 Chry SOLD
Safe Cove Marina, Port Charlotte, FL
Rum is the reason Pirate's have never ruled the world
Done Dreamin'
1987 President 43' Twin Lehman 225SP Turbo
Highfield 310 Ally 15 HP Yamaha 2cycle
1978 F32 Sedan twin 318 Chry SOLD
Safe Cove Marina, Port Charlotte, FL
unfortunately my roof is probably 80% saturated with water. I was looking at possibly removing the upper cap, flipping over and re-laminating it as if it was in the original mold.
I removed the drip rail, and I have brakes int he seam on about 30% of this seam.
I removed internal switch panel where I can see the inside of a 20 inch break in the seam over the center window. I slid a a piece of wood, then a pry bar, I am to lift the upper bridge cap (slightly 1/4 inch or so)
My only concern is, are the two tops bonded in the center-
Is the cap simply held on at the outside seam glue and wood blocks and screws.
-
ready123
- Ultimate User
- Posts: 1841
- Joined: Sat Nov 08, 2008 5:53 pm
- Location: Mactier, Ontario Canada
- Contact:
Contact the owners of this website (Bob, by phone) for a clear answer. I don't believe that it comes off that easily. It seems to me it was bolted down before salon ceiling finish applied.
Why go to that effort... just cut top skin off inside where the curve is and do the repair from above.... it's quite easy.
Then you can replace original skin or redo the non skid.... one of those stucco ceiling rollers leaves a good non skid effect using regular gelcoat.
Why go to that effort... just cut top skin off inside where the curve is and do the repair from above.... it's quite easy.
Then you can replace original skin or redo the non skid.... one of those stucco ceiling rollers leaves a good non skid effect using regular gelcoat.
Michael
Rum is the reason Pirate's have never ruled the world
Done Dreamin'
1987 President 43' Twin Lehman 225SP Turbo
Highfield 310 Ally 15 HP Yamaha 2cycle
1978 F32 Sedan twin 318 Chry SOLD
Safe Cove Marina, Port Charlotte, FL
Rum is the reason Pirate's have never ruled the world
Done Dreamin'
1987 President 43' Twin Lehman 225SP Turbo
Highfield 310 Ally 15 HP Yamaha 2cycle
1978 F32 Sedan twin 318 Chry SOLD
Safe Cove Marina, Port Charlotte, FL
I will try that, thanks!
I figured that if I can pull the cap I wont loose the actual shape of the cap, and I will be able to properly laminate into all of the corners. All of the penetrations would be taped from the outside prior to working, this would act as a cheater guide when reassembling the boat, ensuring that I put everything back where it belongs.
Tom
I had a smaller issue with my bridge. In my case, water entered from the holes which held the apron screws. They had had elongated at the aft end from years of vibration and flexing, and allowed water to enter the core.
I was able to inject epoxy and filler to resolve most of my problems. I sealed all of the screw holes with silicone sealant to prevent further water intrusion.
I was able to inject epoxy and filler to resolve most of my problems. I sealed all of the screw holes with silicone sealant to prevent further water intrusion.
-
Bubbabuda
- Sporadic User
- Posts: 140
- Joined: Mon Jan 31, 2011 10:00 am
- Location: Clifton Park, New York
- Contact:
Tom,
I just rebuilt my entire bridge. I thought of removing "cap" in one piece, not so. I cut it in 4 sections that were manageable if you r doing this alone. My area was a 10x10 section starting behind the aft rail supports and going forward to just beyond saloon upper gagues. First try to make neat cutting lines, you will thank me when you go to re-install top layer. I used a multi-tool to remove the balsa core the remained on the inner surface. When I started mine was so soft the saloon roof was sagging. I cut all soft balst out, then used 2x4s and plywood to shore up the ceiling. Note to self, you have to build back the crown in the bridge. Had to install a scaffold because the inner skin is only 1/8 in thick. I used 3/4 inch balsa core sheets that were 24x48. Used 19 sheets and 1 24x48 3/4 plywood under helm seats.
First step on rebuild was to epoxy one layer of cloth to the saloon ceiling. Dry fit first layer of balsa, trace around each piece and number your pieces and remove. Mix a batch of thickened epoxy, consinsity of mayo. Troll enough epoxy for 2 to 3 pieces at a time. Once first layer is hard, do the same for the second layer.
In a perfect world you will have 1/4 inch left to fill. If not you will have to epoxy any shims needed. The last cote is to use another layer of thickened epoxy and replace your cut out pieces. They will have to be weighted down with blocks so all surfaces contact each other.
After it dries, clean epoxy that oozes out and lay a layer of 3 inch cloth and epoxy.
I do have pics, some of the tear down are on my photobucket. Never posted the awsome finished pics.
If you want to talk about it call me 518-371-8801 Rick