Maybe check with a professional and see if you can "Wet sand" then buff the runs in the finish and keep going from there rather than strip and start over?
Barry
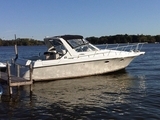
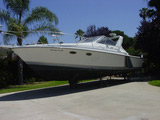
Project: Trojan 10 Meter Express
Moderators: BeaconMarineBob, Moderator, BeaconMarineDon
I sprayed the hulls with Awlcraft 2000. I brush painted the top/deck with Awlgrip.
I went with brushing the top because most of the surfaces are small areas and masking them to spray it would be a nightmare. The specific problem areas are the "vertical" sides by the windshield and the horizontal planes around the outer perimeter of the deck. The rest is no big deal because it's just bordering for the non-skin kiwi-grip I'm going to use.
I will probably have to let it cure well and sand it out, as if I haven't had enough sanding already. The other option would be to kiwi-grip everything but I'm not so sure that would look good on the vertical surfaces.
-
todd brinkerhoff
- Moderate User
- Posts: 696
- Joined: Sun Aug 15, 2010 11:56 am
- Location: Finger Lakes, NY
Have you looked at interlux perfection? It's designed for brushing. No idea if you could match the color though?
1991 Trojan International 10.8 Meter Express hull# 003 - 454 Crusaders
1961 Century Raven 22 - Gray Marine 327

http://s1086.photobucket.com/home/Todd_ ... hoff/index
1961 Century Raven 22 - Gray Marine 327
http://s1086.photobucket.com/home/Todd_ ... hoff/index
I used perfection on the dash area. It's a step down in quality compared to awlgrip for durability.
Anyways, I looked at the topside I did with the awlgrip and something definitely went wrong. Most of the surfaces I painted have a chalky looking finish, no gloss at all. It dried like that even though there was a gloss finish when I applied it. I had left over paint and just left it in the bucket. Check out the picture below of how it dried. It looks like 2-part foam in that it actually bubbled when cured. That tells me there was a heat issue and some type of chemical reaction that wasn't suppose to happen. It was a fairly nice day when I did it, maybe 80 degrees or so. I mixed and followed all of the directions. I'm going to call interlux and see if I can talk to a technician about what I'm doing wrong.

Anyways, I looked at the topside I did with the awlgrip and something definitely went wrong. Most of the surfaces I painted have a chalky looking finish, no gloss at all. It dried like that even though there was a gloss finish when I applied it. I had left over paint and just left it in the bucket. Check out the picture below of how it dried. It looks like 2-part foam in that it actually bubbled when cured. That tells me there was a heat issue and some type of chemical reaction that wasn't suppose to happen. It was a fairly nice day when I did it, maybe 80 degrees or so. I mixed and followed all of the directions. I'm going to call interlux and see if I can talk to a technician about what I'm doing wrong.

Not overly humid at all. It was a nice sunny SoCal day. I started painting at noon and finished @ 4pm. There was still @ 3-4 hours of daylight before it got dusk out and the paint was tacky dry by then.
Below is a more thorough description of the exact process I took, that I posted on another forum to get some additional feedback.
-------------------------------------------------
I’m having some major problems applying awlgrip using the tipping method. I’m using it for the topside of my deck. I used the special awlcat#3 activator specifically for brushing and the special awlT0031Q reducer specifically for brushing. I mixed 3:1 per the instructions and thinned only a little bit as it was a nice sunny day at @ 80 degrees.
When I started applying it everything seemed to be going excellent. The finish was incredibly glossy with very little signs of brush strokes, so I went on my merry way. After about 30 minutes of applying I looked back expecting to see a wonderful result only to see a bunch of runs occurring! It was weird to me that it would look great and then run after so much time had gone by.
So, I increased the pressure I used when tipping to put a thinner coat on to avoid runs. This left more pronounced brush strokes but I was hoping it would flow out. The runs decreased but the brush stroke imprints increased.
I finished the application of 4 hours of work and not too happy with the results. I will have to re-sand and reapply.
After letting it cure for a day I reviewed the results. To my surprise, most of the painted surface now has a chalky finish, no shine/sheen/gloss at all. The day of application when everything was finger tacky dry all of the surface had a gloss finish aside from the runs and brushstrokes. This “chalky†finish occurred after the paint had taken a “setâ€. Not all of the surface has this chalky finish but most of it does.
I tried taking some pictures to illustrate the problem but none of them turned out good enough to share.
When I applied the paint I had some left over and I just left it in the container. There was @ 1-2 inches of depth of paint. The photo below shows the paint a couple of days later. It actually bubbled when cured as you can see in the picture. This doesn’t look right to me at all and tells me there was a heat issue causing a chemical reaction resulting in the bubbles.
Anyone ever see this reaction before?
Anyone have a clue as to what I’m doing wrong?
I’m going to have to do a lot of sanding and reapply everything and the thought of screwing it up again doesn’t bode very well! Cheers.
Relative humudity levels are important to monitor before starting with a lot of products; single parts and especially epoxy based. What did you use to prime prior to painting, and what product did you use to wipe down the surface prior to application? Awlgrip is not the easiest product to apply on a vertical surface without spraying. Don't get me wrong, I'm all for the roll and tip method but unless you get all the conditions and mixing just right with some products, it can produce less than desirable results. The pail looks like too hot a mix. Let us know what you find out.
She was a 1969 36 ft wooden beauty with big blue 440s that we'll miss forever.
And thanks to the gang, 2012 Trojan Boater Of The Year
And thanks to the gang, 2012 Trojan Boater Of The Year
Years ago, I rolled and tipped a 30' Carver. I used the then current Interlux 2 part LP, do not remember the exact name of it. I had an area that flowed out perfectly and when I came back the next day, it had no gloss. What we found out was that I did not have enough time when I finished painting before the dew set during the night. I was more careful about painting late in the day and did not have the problem again. This was in Tucson and we do not get a lot of dew or humidity... When all was finished the boat looked fantastic, but I would not do it again. We had to start painting at 6 AM due to the temperatures in Tucson. The paint would not flow at temperatures above 80 degrees. That was why we were painting late in the day some times. Interlux was very good in supporting me over the phone and that was why I went with Interlux instead of other manufacturers.
Good luck, it will look great when you are done.
Good luck, it will look great when you are done.
Trojan has been sold
1987 President 41 DC 225 Lehmans
Au Gres, Michigan
1987 President 41 DC 225 Lehmans
Au Gres, Michigan
Absolutely correct, the dew point is critical to know if you suspect the coating will not have tipped off enough for the finish to cure properly prior to dew setting in.comodave wrote:Years ago, I rolled and tipped a 30' Carver. I used the then current Interlux 2 part LP, do not remember the exact name of it. I had an area that flowed out perfectly and when I came back the next day, it had no gloss. What we found out was that I did not have enough time when I finished painting before the dew set during the night. I was more careful about painting late in the day and did not have the problem again. This was in Tucson and we do not get a lot of dew or humidity... When all was finished the boat looked fantastic, but I would not do it again. We had to start painting at 6 AM due to the temperatures in Tucson. The paint would not flow at temperatures above 80 degrees. That was why we were painting late in the day some times. Interlux was very good in supporting me over the phone and that was why I went with Interlux instead of other manufacturers.
Good luck, it will look great when you are done.
She was a 1969 36 ft wooden beauty with big blue 440s that we'll miss forever.
And thanks to the gang, 2012 Trojan Boater Of The Year
And thanks to the gang, 2012 Trojan Boater Of The Year
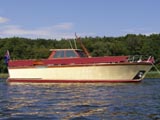
May be some inspiration ???
http://www.thehulltruth.com/boats-sale- ... -sold.html
Looks cool and very close to your project
--
Greetings - Heiner
http://www.thehulltruth.com/boats-sale- ... -sold.html
Looks cool and very close to your project
--
Greetings - Heiner
-
jefflaw35
-
jefflaw35
Jeff, I think you're too used to spray painting in a controlled environment. Try spraying out in the open, changing temps, in the wind with bugs using your work as a runway, in the sun, less than perfect lighting, rain, etc etc. That’s boat painting for an average guy in his back yard for ya 
She was a 1969 36 ft wooden beauty with big blue 440s that we'll miss forever.
And thanks to the gang, 2012 Trojan Boater Of The Year
And thanks to the gang, 2012 Trojan Boater Of The Year