Page 1 of 4
F-36 Gas to Diesel
Posted: Tue Oct 16, 2007 8:31 pm
by Danny Bailey
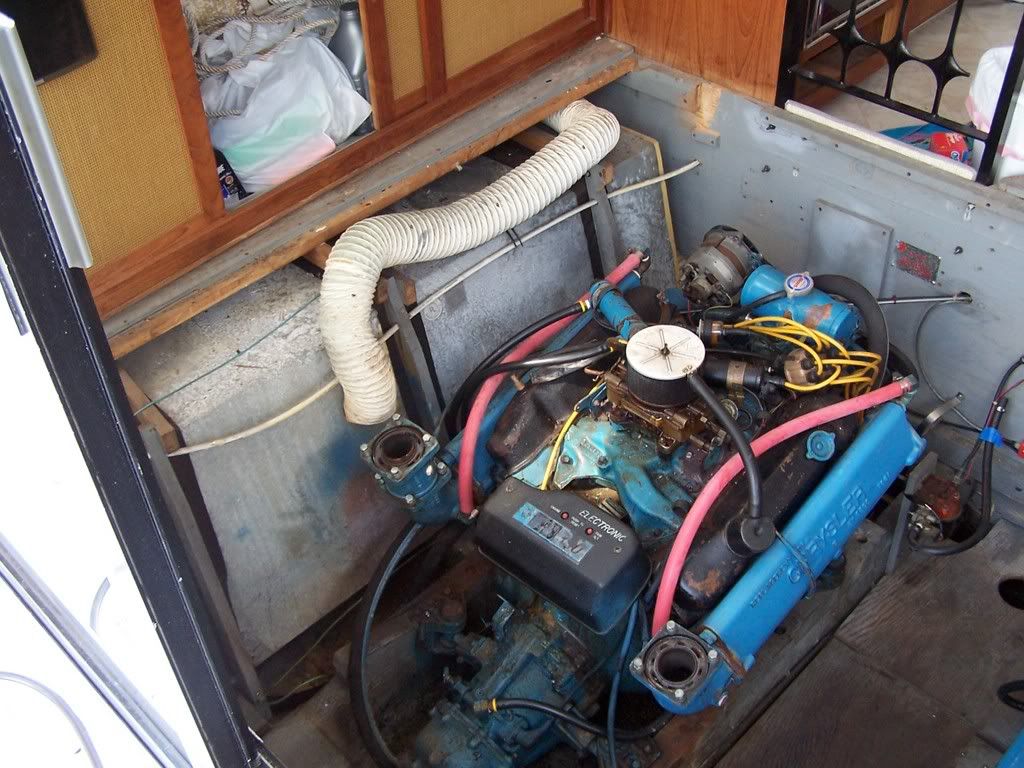
First full day today of pulling my 440's to replace them with 6BTA Cummins. Had a good friend help me and we got all the hatch & floor framing out, all the gas tank retaining structure out, the big wad of wires on the right side mostly disconnected and out of the way, the exhaust Y's and hoses out, batteries, battery boxes and paralleling switch out, all wires and hoses disconnected from the engines and some engine vibe mount lag bolts out. Someone tell me how to post pictures and I'll show you a gutted F-36.
Danny
painting
Posted: Wed Oct 17, 2007 12:43 pm
by JuiceClark
I used leftover white Imron from painting topside to roll the engine room white when repowering...feels like a laboratory in there.
Tony
Posted: Wed Oct 17, 2007 2:00 pm
by jav
Danny-
have the pictures on the web somewhere - photobucket.com works well. then copy and paste the link from that picture into the post. Some sites like photobucket will automatically fromat the link with "/img" tags which is what allows the forum to display the picture and not the link.
Posted: Wed Oct 17, 2007 6:37 pm
by Danny Bailey
Thanks for the advice...I'll use it. Both engines are now ready to lift out. The only thing stopping me on the tanks are the 1 1/2" galv pipe filler plumbing. Could not get any of it to budge and the tanks won't slide inboard until it's removed. After I get all the gas possible out, I'll fill them with water to prevent an explosion and saw the pipes off with a Sawzall. About 1/3 of the engine mount lag bolts wrung off when I was taking them out. Those 440's were not about to slide off the beds.
Posted: Fri Oct 19, 2007 4:41 am
by Danny Bailey
Posted: Fri Oct 19, 2007 6:50 am
by RWS
When I did my repower, I decided to have my fuel tank inspected. We found a spot of corrosion on the outside where the back corner of the tank was sitting in bilge water over time.
Decided to relocate the aft bilge pump and switch and had a new tank fabricated. A special epoxy coating was applied to the bottom half of the new tank.
THese refits cost a great deal of time, effort, skinned knuckels and of course money, however when done right the results can be outstanding.
It's worth the effort. If you liked your boat, you will love her when you are done.
RWS
Posted: Sun Oct 21, 2007 11:09 pm
by prowlersfish
can't wait to see them Cummins in your boat you will love em .
Posted: Tue Oct 23, 2007 3:51 pm
by Danny Bailey
Pulled both engines and fuel tanks this morning...took 30 minutes!! I had everything disconnected and out of the way and the non-moveable portion of the back sliding doors out. Alan at Sailcraft Services (the boatyard I'm in) has a steel beam that fits on his travel lift and sticks right in the back door to snake the big pieces out. Will post some more pics soon.
Danny
Posted: Tue Oct 23, 2007 8:14 pm
by rossjo
Cool - I'd love to cme and see it when I come up for Tuna fishing sometime!
Are you replacing the scupper and water feeds with larger, brass pipe?
Posted: Sun Oct 28, 2007 6:16 am
by Danny Bailey
rossjo - Be glad to show you the boat. Shoot me an e-mail next time you're headed this way.
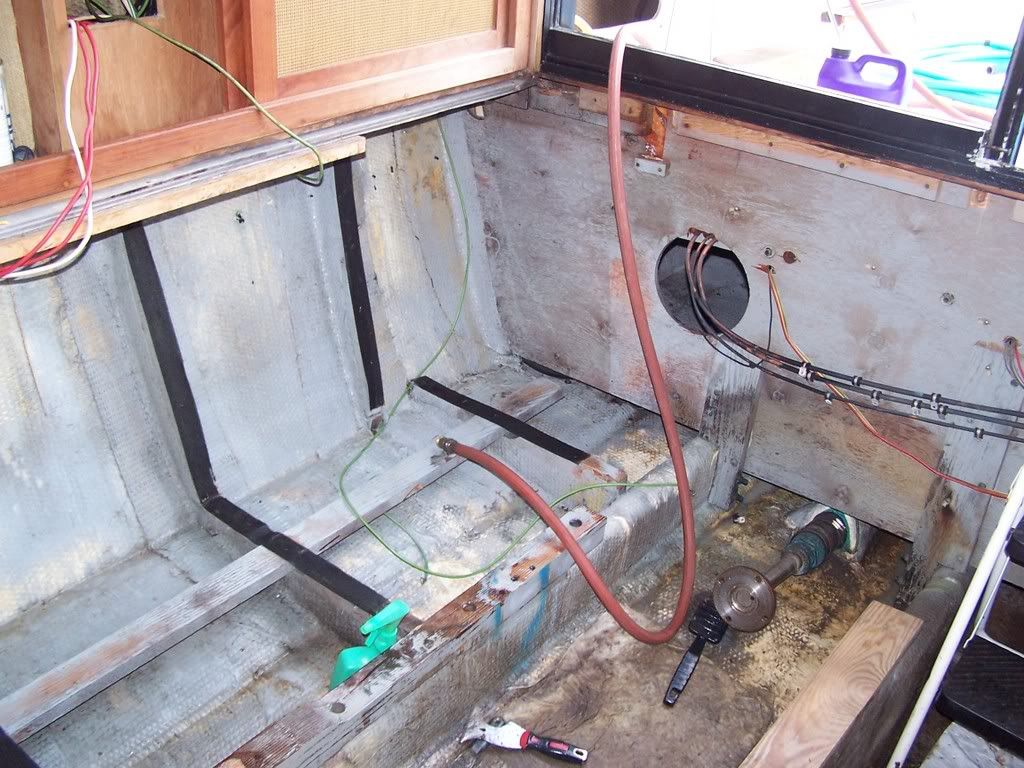
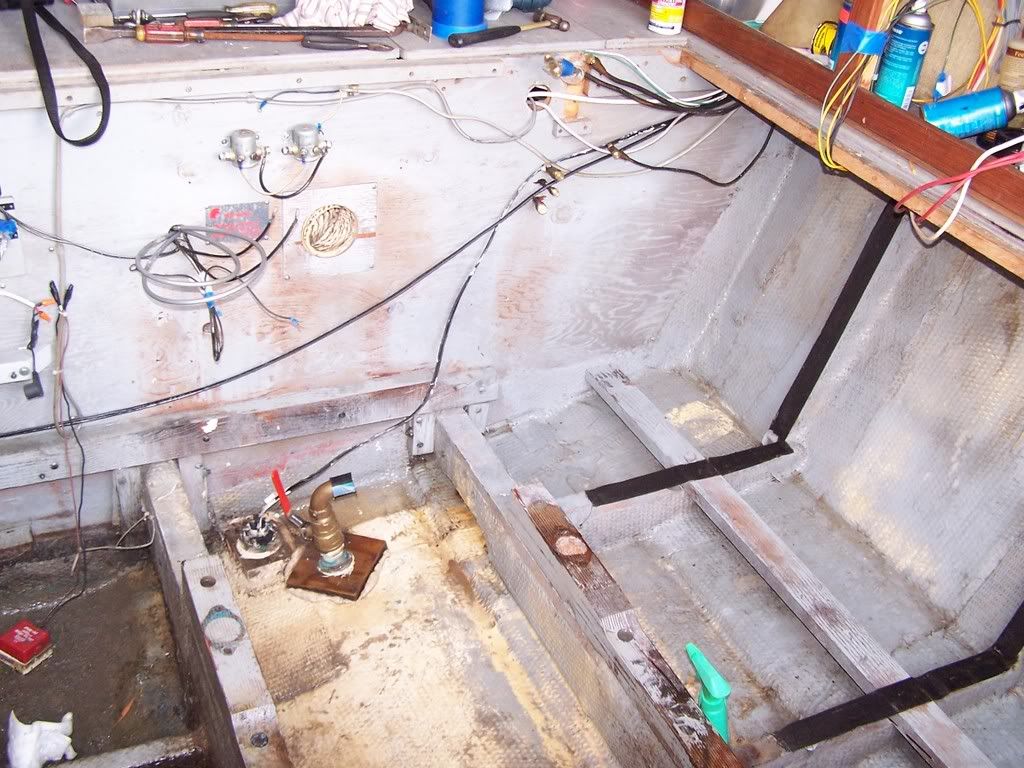
The engine seawater intakes will be replaced with 1 1/2". The scuppers between compartments in the bilge will be opened up some and cleaned out. Standing bilge water was a problem and if left unresolved will rot out stringers. Bilges are mostly cleaned...will paint next week. Have decided to replace original galvanized steel tanks with aluminum versus 50 gallon plastic tanks in several locations. Been doing a lot of measuring too. I may have to cut my shafts off and slide the Cummins back 6 inches to keep it all under the floor. Going to be a tight fit height wise. I have the old Onan loose and ready to lift out. Got to replace that rust ball also.
http://i235.photobucket.com/albums/ee26 ... 0_0494.jpg http://i235.photobucket.com/albums/ee26 ... 0_0499.jpg
Posted: Sun Oct 28, 2007 8:26 am
by RWS
Danny,
Over the years a great deal has been discussed about the F Series bilge water and "that smell"
The International series has a liner in the bilges. The liner has a couple of factory drain holes located at the center line.
The rear bilge pump and switch are mounted on top of the liner. When I replaced the fuel tank on my International I cut out a section at the rear of the liner to allow the bilge pump and switch to be mounted below the liner, directly to the hull.
This seems to have made a difference.
Don't know if or how this may apply to the F series.
Also, when we did our retrofit we added a 4th bilge pump. It and it's switch are raised somewhat above the normal bilge level and are wired in to the generator battery with an inline fuse. I plan on adding an alarm feature to this system as well.
You might also consider adding a set of crash pumps while you are modifying the raw water intakes. All you need is an additional tee fitting and a ball valve. This would also be a great time to drill and tap in another small ball valve to that tee to add a fresh water flushing system. This would extend the life of your heat exchanger and any oil coolers on the raw water cooling side.
We added extra lights (in explosion proof enclosures) and painted our bilge in Interlux Bilgecote white same as the factory color.
Your pictures are appreciated.
RWS
Posted: Sun Oct 28, 2007 8:05 pm
by Danny Bailey
RWS
I know what you mean by 'that smell'. We would get a whiff of it every once in a while down in the passageway between the head and dinette. Since I had replaced all the head plumbing and hoses I knew it had to be coming from somewhere else. I finally found it by chance while changing the A/C seawater supply hose. It was coming out of the enclosed hollow keel. I cut one hole in the forward end of the void enclosure and two in the aft end. After it aired out and some bilge water flowed through it, haven't smelled it since. I like your ideas of a 'high water' alarm, crash pumps and engine flusher. I will incorporate these as Southern Cross goes back together. Keep the tips and sympathy coming...this is one heck of a project!!
Danny
Posted: Fri Nov 02, 2007 10:02 pm
by Danny Bailey
Been working on new engine beds this week. The forward mount on the Cummins will be 5 1/2" above the stringer...the old bed was only 2 1/2" high....had to come out. The aft mount will be notched about 1" deep into the stringer. For 27 year old wood the 2 1/2" thick fir stringers in this boat are perfect. I have not found any rot whatsoever.
Anyone know what has become of Ray Workman? I've been trying to contact him to come get my 440's.
Danny
Progress?
Posted: Thu Nov 08, 2007 9:29 pm
by rossjo
How is that Diesel install going?
Posted: Sat Nov 10, 2007 5:23 am
by Danny Bailey
New engine beds are in, old couplings are off the shafts, stuffing boxes and hoses are out for hose replacement, trim tab actuators are removed for replacement, seawater intakes and valves are removed for installing larger ones and yesterday I started cutting pieces of 1/4 inch 5052 aluminum to build my new fuel tanks out of. I'll post some more pics next week.
Danny