This forum is for comments and the exchange of information relating to Trojan Boats and boating. Please do not post used parts or boats For Sale in this area. For general, non-boating topics please use our "General Discussions" section.
Note: Negative or inflammatory postings will not be tolerated.
I was installing my new prop shafts and cutlass bearings, and found out I have a bent rear strut. The port side went in fine and had good free movement and rotation. The starboard side was binding up.
Back when I removed my old shafts I saw that the starboard front strut was loose. I waited until I had the new shafts to remount it so I could use the shaft to align the strut.
So when I installed everything it was pretty obvious that it wasn't happy. I removed the front strut that I had remounted so I could evaluate the rear strut without being impacted by the front strut. Sure enough the shaft is not even close to being where its suppose to be. Evidently the previous owner ran aground or hit something and bent the strut. That's also what probably caused the front strut to come loose.
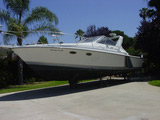
In the pictures below you can see how far the rear strut is off. This is with the front strut removed and I'm supporting the shaft in the middle of it's free play.
I think I know the answer to this question but I'll ask anyways. Is there some secret ole salty dog recipe for fixing this strut while still attached to the hull? I'm thinking probably not and I'll just have to replace it?
Unless it's an obviously bad bend that renders the strut structurally unsound, I would shim its aft section so it raises the shaft. Given its length, it shouldn't need much of a shim to raise it that high. Remove the strut, clean hull and strut mating surfaces, bolt up strut loosely, insert shaft and slowly tighten up bolts fore and aft until you get the shaft lined up. This will give you an idea of shim thickness. If it's apparent that it will require too much shimming, send in for repair.
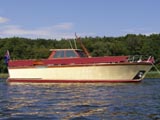
She was a 1969 36 ft wooden beauty with big blue 440s that we'll miss forever.
And thanks to the gang, 2012 Trojan Boater Of The Year
Thats a bummer man! Hope you find an easy way around this. I look forward to learning and seeing how you resolve it. I thought you were very close to being finished
Just a question, could the mis-allignment be due to blocking on the hard. It seems to me that the boat can flex. If one did not hit anything with the strut, don't see how it could be out of allignment.
Larry Eddington
1984 F-36 Tri Cabin "The Phoenix II"
1978 F-28 "The Phoenix"
Fish Master 2350 Bay Boat
9.5' Dink
Ok, I was able to fix it without taking it off. What a relief. So here's how I did it in case it can help someone in the future.
I removed the new shaft and new cutlass bearing. I machined an aluminum round piece that is 1.97" OD with a bore of 1.27" which basically is a solid cuttlass bearing. I then used a 4' section of the old prop shaft. I inserted the aluminum piece into the strut and then the 4' section of prop shaft in the bore of the aluminum piece. The aluminum piece is essential because it distributes the load around the whole circumference of the strut avoiding any oblong of the strut hole.
Then I placed a floor jack with blocks underneath the front tip of the shaft which is now hanging @ 3' in front of the strut. Raised the jack up to take all the slack out.
Now is when you have to take your time. I didn't just start cranking up the jack because when using the jack you don't get any "feel" for when you reach the yield point of the strut. The yield point is when a piece of metal actually bends. Anything before the yield point and the metal simply springs back to its previous position. I only needed @ 2" of swing at the end of a 6' bar so the actual movement of the strut is minimal, hense being very careful of when you reach the yield point.
So, to address the problem of not knowing where the yield point is I took measurements and made lots of "jacking" cycles. First off I placed a mark on the prop shaft to index its position relative to the strut (how far it was inserted into the strut). Then I placed a mark near the end of the shaft (travel mark).
Step 1: without any jack pressure and the shaft in its marked place, take a measurement from the ground up to the travel mark on the shaft. Let's say this is 20".
Step 2: carefully and slowly jack up the front of the prop shaft. Only go a small amount. I did something @ 5". I also had a friend watching the strut and mounting just to make sure everything was happy there. At the top of the travel take a measurement from the ground to the travel mark . Let's say this is 25".
Step 3: lower the jack and take another measurement as in Step 1. If this measurement is still 20" then the yield point has not been reached.
Repeat Step 2 and go a little higher, take another measurement and compare it to Step 1's measurement. The idea is to slowing approach the yield point by taking measurements. Once you hit the yield point you only go in very small increasing heights of the jack.
This process took several steps of increasing the jacking heights and took a lot of time but not screwing it up is more important. After I reached the yield point I went in small increased amounts (@1') and then completely removed the shaft and aluminum piece. I would reinstall the cuttlass bearing about half way and new shaft, slide it up and see where everything was. Then I reinstalled the aluminum piece and repeated the steps. I repeated this step several times. It took a couple of hours of this going slowly and watching everything carefully. But a couple of hours beats taking that strut off by a large margin. Hope this can help someone! cheers.
I don't think this was due to just sitting on the hard, for 2 reasons.
1) the intermediate strut was loose, as in something happened before to jar/loosen that strut.
2) when I completely removed the intermediate strut the shaft wouldn't even go in the hole where it enters the hull without significant binding. This was the main indicator that the main strut was bent.