Seacock Replacement
Moderators: BeaconMarineBob, Moderator, BeaconMarineDon
Re: Seacock Replacement
I used west system epoxy with the adhesive filler. (Colidal silica). I taped the thru hull fitting with blue tape and used it along with the seacock with greased threads to compress and hold the backing plate in place. I removed everything before the epoxy set up too hard. Kind of a pita but I figured I only had to do it once since it will never rot again.
Todd Pote
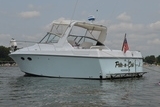
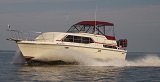
1987 10 Meter Mid Cabin
Double Pote-N_Sea
1992 Scout 15.5 Center Console
1987 10 Meter Mid Cabin
Double Pote-N_Sea
1992 Scout 15.5 Center Console

Re: Seacock Replacement
Yup, read that and tweaked it a bit. I drilled and tapped my 3/4 backing plates and ran bronze bolts into them. Its a bit of a pain indexing everything but eliminates three holes through the hull. Great article ! It is definitely worth reading some of the other articles on the "pbase" site. I learned a lot!
Todd Pote
1987 10 Meter Mid Cabin
Double Pote-N_Sea
1992 Scout 15.5 Center Console
1987 10 Meter Mid Cabin
Double Pote-N_Sea
1992 Scout 15.5 Center Console
Re: Seacock Replacement
So did you do the "Option 2" where you did not go through the hull with the bolts?
He has a few good articles on servicing old seacocks. Mine leak a little bit and I was considering replacing them, but I may as well try his method first.
I also learned a lot about marine wiring from him and applied those techniques on my Land Rover for off-roading.
He has a few good articles on servicing old seacocks. Mine leak a little bit and I was considering replacing them, but I may as well try his method first.
I also learned a lot about marine wiring from him and applied those techniques on my Land Rover for off-roading.
Re: Seacock Replacement
Hi guys!
OK the folks are gone. Had a good time! Lots of wine and a delicious Paella.
I was able to sneak a few minutes of "work" today an completed 2 backing plates. On Saturday, I picked up 4 seacocks for the V-drives and 1 for the generator. I need to do the plates for those this week. I am trying hard to get everything ready for next weekend. I am taking the week of the 18th off to get the boat further along. Installing the new trough-hulls, filling the unused holes and start looking at the engines. This will be fun!
Bjanakos,
I am going to put the bolts through the hull! Might as well have this bullet proof as well! Should not be a problem if properly sealed. I actually never slept on a pleasure craft. To me its just for peace of mind! Probably not needed but again, why skimp on this since there is no additional cost? The seacocks were all original and lasted 40 years! Its about time they get replaced... Hopefully the new ones will last another40
Christian
Re: Seacock Replacement
Maybe I should clarify!
I received my family over for Mother's day un Sunday. I spent most of the weekend preparing food for my guests.
Christian
I received my family over for Mother's day un Sunday. I spent most of the weekend preparing food for my guests.
Christian
Re: Seacock Replacement
I decided to drill and tap the fiberglass backing plates instead of drilling holes through the hull for bolts. took a bit more time to layout the holes so everything indexed properly but So far I think it was worth the effort. figure I can always add bolts later if I ever have a problem
Todd Pote
1987 10 Meter Mid Cabin
Double Pote-N_Sea
1992 Scout 15.5 Center Console
1987 10 Meter Mid Cabin
Double Pote-N_Sea
1992 Scout 15.5 Center Console
Re: Seacock Replacement
yorklyn,
I got some West System 404 instead of the "kitty hair"
From their website:
"404 High-Density filler is a thickening additive developed for maximum physical properties in hardware bonding where high-cyclic loads are anticipated. It can also be used for filleting and gap filling where maximum strength is necessary."
It should do the trick!
How did you plug the pre-existing bolt holes? I'm thinking of making a chamfer on both sides using a 90deg or 82deg countersink bit and filling it up with the 404 thickened epoxy. Any thoughts?
Christian
-
P-Dogg
- Active User
- Posts: 964
- Joined: Wed Jun 22, 2011 7:15 pm
- Location: Near Baltimorgue, Murderland, where they prove every day that gun control doesn't work.
Re: Seacock Replacement
I did this when I did my underwater exhaust rebuild, using Six10.I'm thinking of making a chamfer on both sides using a 90deg or 82deg countersink bit and filling it up with the 404 thickened epoxy
http://www.trojanboats.net/wforum/viewt ... ild#p87107
http://www.westsystem.com/ss/new-six10-epoxy-adhesive/
I needed a less expensive hobby, so I bought a boat!
Re: Seacock Replacement
Hi P-Dogg,
Very impressive work! If it's worth doing, it's worth doing well...
I spend the weekend at the boat doing more of the work. I prepped the hull fibreglass to receive the backing plates. All 7 of them...
Here is the starboard raw water engine cooling inlet.
I then glued the plates with West System epoxy and 404. Again starboard raw water engine cooling inlet
Here is a view of the V-Drive raw water inlets.
I temporarily used the through hulls as guides for the plates. I "buttered" the plates enough to have epoxy ooze out all around. 2 added benefits is that on the outside circumference, I was able to make a fillet and it leveled the plate with the outside of the hull so that the everything is parallel. the seacock and through hulls will sit flush with the hull. Since I am doing this alone, it was easier to put the through hulls from inside and put the nut on the outside...
So. I completed the 2 raw water engine cooling inlets and the 4 V-Drive water inlets and outlets.
Very impressive work! If it's worth doing, it's worth doing well...
I spend the weekend at the boat doing more of the work. I prepped the hull fibreglass to receive the backing plates. All 7 of them...
Here is the starboard raw water engine cooling inlet.
- IMGP1999small.jpg (133.32 KiB) Viewed 7406 times
- IMGP2001small.jpg (142.78 KiB) Viewed 7406 times
- IMGP2003small.jpg (169.82 KiB) Viewed 7406 times
So. I completed the 2 raw water engine cooling inlets and the 4 V-Drive water inlets and outlets.
Re: Seacock Replacement
I also tackled 2 in the port lazarette. One for wash down water and the other one I'm not sure what it's for...  I removed the through hulls and valve/seacock and prepped the hull to receive the plates. Access was brutal but in the end it was the easiest to do in terms of removing the hardware, cleaning and prepping. It went surprisingly well.
While being there, I noticed that the hose for the blower was completely shot. I will replace that this week as well.
- IMGP2006small.jpg (147.23 KiB) Viewed 7405 times
While being there, I noticed that the hose for the blower was completely shot. I will replace that this week as well.
Re: Seacock Replacement
So! I completed 6 in the engine compartments plus the one for the generator. I have 3 to go. 2 in the lazarette and one under the aft head floor. I probably will go back tomorrow to work some more...
Now, As I mentioned earlier, I have 2 old seacock holes to plug. I started grinding fibreglass to 12:1 ratio recommended by West System but I have a few issues:
1- the hull thickness is 1/2 in such that a 12:1 ratio would bring be to a 6 inch radius all around the hole It will take for ever to grind it down. So I was thinking of getting this item from Lee Valley tools:
It should help a lot. Any of you have experience with this grinding wheel?
2- I have a feature in the way. I don't know what its called but I am sure it has a name. Here is a picture:
Does anyone have an idea on how to resolve this? No sure how to proceed on this one.
Christian
Now, As I mentioned earlier, I have 2 old seacock holes to plug. I started grinding fibreglass to 12:1 ratio recommended by West System but I have a few issues:
1- the hull thickness is 1/2 in such that a 12:1 ratio would bring be to a 6 inch radius all around the hole
- 77J6210s4.jpg (87.83 KiB) Viewed 7404 times
2- I have a feature in the way. I don't know what its called but I am sure it has a name. Here is a picture:
- IMGP2008small.jpg (114.77 KiB) Viewed 7404 times
Christian
Re: Seacock Replacement
OK Google is my friend! They are called Lifting Strakes. This is what is in the way. Should I grind it down as well or stop to it. Is there wood in there of just glass?...
Re: Seacock Replacement
I used a few different tools when I was patching old holes. on the hull (+-1/2 inch thick) I used a 4 inch grinder with 36 grit sanding disk on a flexible rubber pad. on the thinner fiberglass (cockpit sides) i used a 5 inch DA sander up on the outside edge with 60 grit. I wouldn't worry too much if you cant get the full 12:1. what your trying to do is give yourself more surface area for the epoxy to bond to and enough depth to allow you to build up enough layers of fiberglass to provide sufficient strength . i patched a hole for an old transducer by beveling the both the underside of the hull as well as the interior of the hull. I believe I went about 9 inch diameter to fill a 1-1/2 inch hole. by beveling both sides It gave me a sufficient thickness of new glass that was were keyed together through the hole.
If it were me I would continue beveling up onto the strake but be careful not to go through it.
also be careful about the epoxy heating up if you build up too many layers all at once.
Sounds like you already read this but in case you didnt.
http://www.westsystem.com/ss/assets/How ... enance.pdf
Keep up the good work!!!
Todd Pote
1987 10 Meter Mid Cabin
Double Pote-N_Sea
1992 Scout 15.5 Center Console
1987 10 Meter Mid Cabin
Double Pote-N_Sea
1992 Scout 15.5 Center Console
Re: Seacock Replacement
Thanks Todd.
Hopefully, I won't have to go to the extent you did on your boat! Hopefully she will be in the water this summer...
Christian
Hopefully, I won't have to go to the extent you did on your boat! Hopefully she will be in the water this summer...
Christian