Page 3 of 5
Posted: Wed Oct 19, 2011 11:38 am
by EM63
https://picasaweb.google.com/1006612425 ... 7oH-9oq_Xw
...now - it should work

PS: I like this pic very much:

Posted: Wed Oct 19, 2011 11:45 am
by DAVIDLOFLAND
Wow. Thank you very much.
Posted: Wed Oct 19, 2011 1:31 pm
by larryeddington
I went fishing in Alaska this summer on a tollycraft 37, here is how they fixed a cutting board.

Posted: Mon Oct 31, 2011 10:08 am
by DAVIDLOFLAND
TEST. TRYING TO POST IMAGES, BUT GETTING THIS MESSAGE
131
Forbidden
You don't have permission to access /wforum/posting.php on this server.
--------------------------------------------------------------------------------
Apache/1.3.42 Ben-SSL/1.60 Server at
http://www.trojanboats.net Port 80
0
Posted: Mon Oct 31, 2011 11:20 am
by EM63
May be the same button: make this album official ?!?
Your last link to your paintjob was only reachable by having this link.
Test:

--
Greetings - Heiner
Posted: Mon Oct 31, 2011 12:07 pm
by EM63
Here some of David's pictures:
Hope it will help a little

--
Greetings - Heiner
Posted: Mon Oct 31, 2011 12:13 pm
by EM63
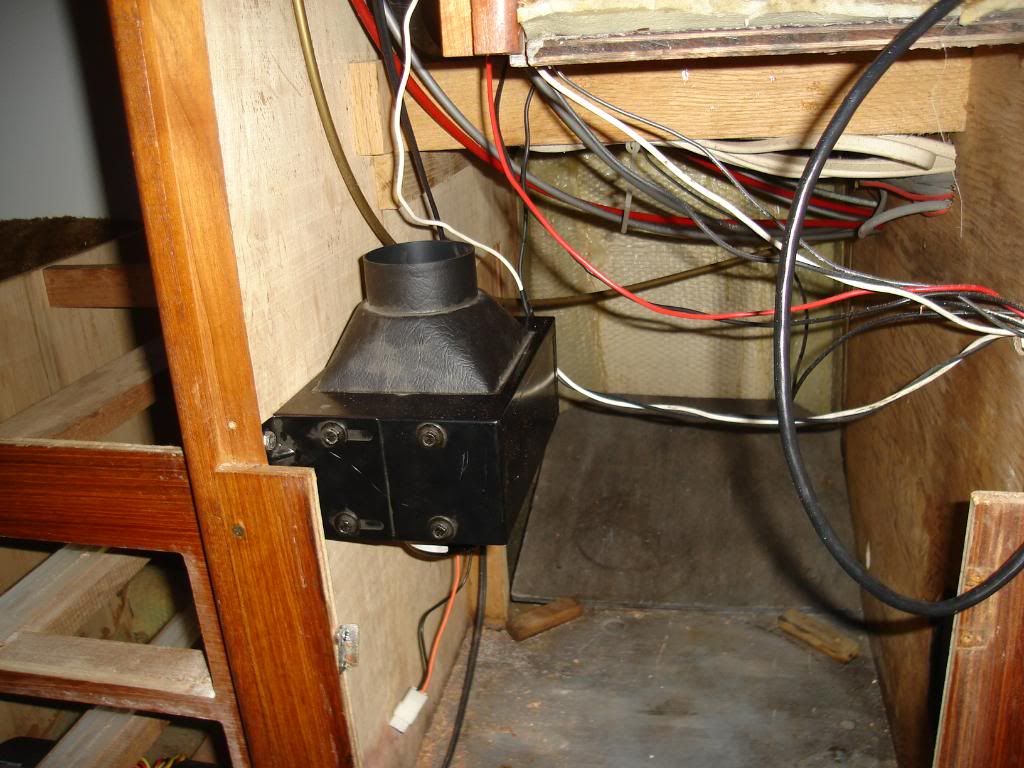
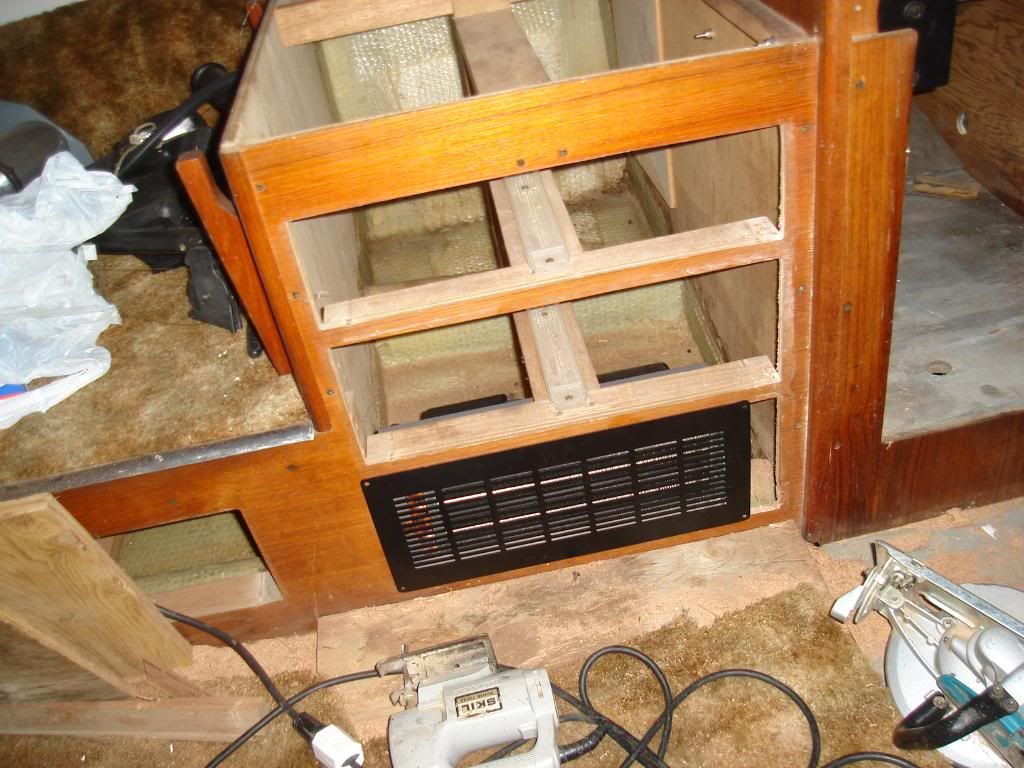
Text from David's post:
Cabin heat and windshield defrost. As you can imagine, this is important in Alaska.
I installed a large Reddot type heater in place of the bottom, right hand draw under the dinette, and also a small Reddot type heater in the cabinet under the helm.
Posted: Mon Oct 31, 2011 12:14 pm
by EM63
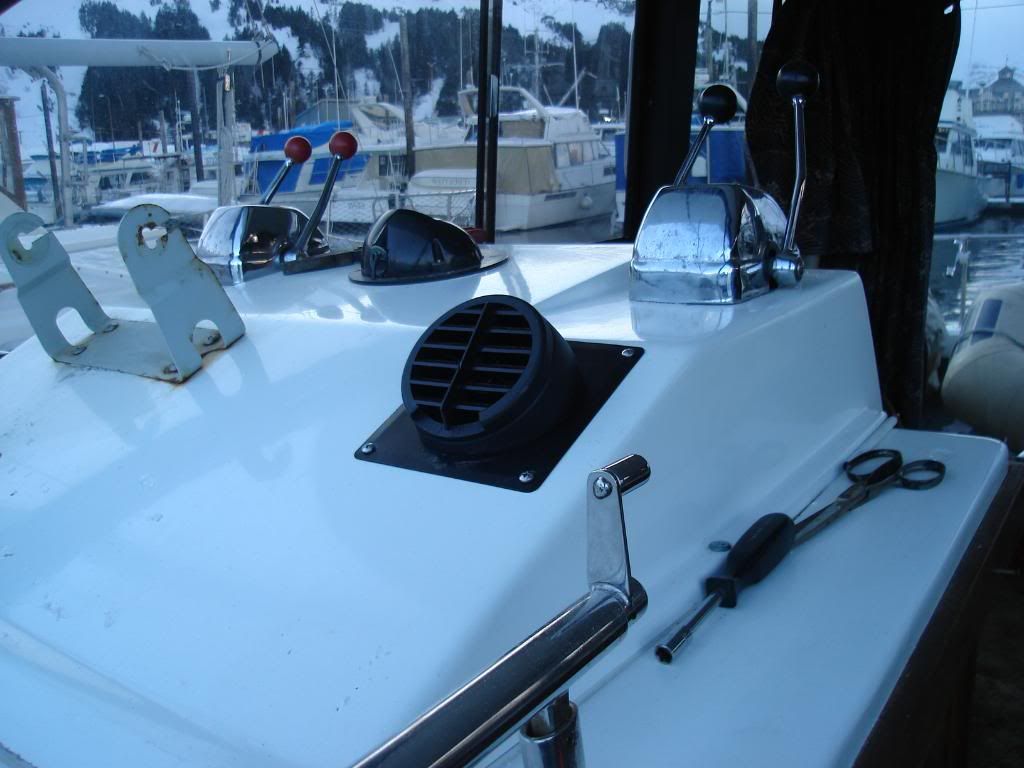
Both are run off a single hot water (coolant) loop front the Stbd engine. From the heater in the cabinet, a flexible duct (not shown) comes straight up inside the cabinet, 90's forward under the top of the helm, then ends in an adjustable louvered vent that is pointed at the windshield.
Posted: Mon Oct 31, 2011 12:17 pm
by EM63
The whole de frost_sy stem (he ater, du ct, and lou vered vent) was found at a truck shop, and is very common. Works fantastic, and was not technically difficult to install. Each heater blower has it's own 4-position switch, located just under, and to the left side of the helm, so you can reach them from above, or standing in the galley below.
Posted: Mon Oct 31, 2011 12:21 pm
by EM63
Now I think I know the fault: any keyword of Dave's post was responsible for - this blocking.
I've split the original text in parts to find out. Now you can read his message
--
Greetings - Heiner
Posted: Mon Oct 31, 2011 6:09 pm
by alexander38
another place to get heaters like that is Mill Supply I use them to add heat in the cab and hear of my FedEx Ground trucks....they run you out if you set them right....
Posted: Mon Oct 31, 2011 6:56 pm
by prowlersfish
I use a west marine heater up on the flybrige ,and run the gen set . oil filled heater down below .
Posted: Sun Nov 20, 2011 7:18 pm
by drbbqking
the f32 i'm lookin at has the fly bridge off and the top, deck of the flying bridge is crased and cracked has anyone used a twopart liquid rubber roofing stuff that they use for rv's EPDM coatings makes what looks like a good one
Posted: Sun Nov 20, 2011 7:27 pm
by DAVIDLOFLAND
Might work, but it's not really fixing the cracks.
Another choice for such a cosmetic repair would be spray bed-liner material. One DIY product is called Raptor, available in auto paint supply stores. You catalyze it in the jar, then screw on a spray gun top (like an undercoating gun), then spray it on. Dries tougher and would withstand treading on it better than rubber roof coating.
I think anything other than grinding the cracks gone, is gonna be cosmetic though
Posted: Sun Nov 20, 2011 8:47 pm
by ready123
drbbqking wrote:the f32 i'm lookin at has the fly bridge off and the top, deck of the flying bridge is crased and cracked has anyone used a twopart liquid rubber roofing stuff that they use for rv's EPDM coatings makes what looks like a good one
Have you checked to see if the core is wet to cause this? Get a plastic headed hammer and rap the top surface hard.. any dull sound will suggest a wet core.... fix that first as the filled cracks will re-appear as the root cause has not been fixed.
Or use a moisture meter on the floor... best test solution.