This forum is for comments and the exchange of information relating to Trojan Boats and boating. Please do not post used parts or boats For Sale in this area. For general, non-boating topics please use our "General Discussions" section.
Note: Negative or inflammatory postings will not be tolerated.
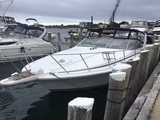
I finally got around to removing the pulpit. It's not proving to be as easy as the engine hatches. In this video, I have it upside down and the part I'm showing is the section just in front of the anchor locker hatch. It's really only the four carriage bolts that attach the whole pulpit to the bow.
This area is part balsa and part plywood. I removed the top section (not shown here) and will replace both this time filling all the holes with epoxy and drilling out. There are 1/2 dozen places for the pulpit to leak into the core, I can't imagine that anyone really has dry one but does it really matter.....
I say that because the rest of the pulpit is not so straight forward. I was hoping to remove the entire top section (the horseshoe shape) because mine is cracked on top and my meter pegs just about everywhere. The problem is everything outside of what you see in the video is a thin layer of balsa (1/2") with really thick fiberglass on each side. That makes sense because the pulpit needs to be strong. The problem that creates is there is no easy way to cut through the fiberglass so I can get to the wet wood. I have deep cuts all around the outside perimeter but I'm no closer to getting to the problem.
I'm going to take another look but I might wind up leaving the forward 2/3 "wet" and do a cosmetic repair on the top. The glass is so thick that the wet core here doesn't make a structural difference but it bugs me anyway. I have all winter but can't even think of a way to dry it out.
The good news is the pulpit comes off easily so this is a project you can bring home. I'll let you guys know what I come up with.
You might look at rotdoctor.com. If you can drill some holes and vacuum as much moisture out as possible, then inject some of this resin which can, supposedly, tolerate some moisture. I have not used this product, but it looks very interesting since you do not have to completely dry out the core.
Trojan has been sold
1987 President 41 DC 225 Lehmans
Au Gres, Michigan
Thanks for all your efforts in sharing this project.
I'm looking forward to the next installment.
Also a question: why not reinforce the pulpit with glassed in square aluminum tube?
We use this material all the time in structural situations to support hurricane protection.
RWS
1983 10 Meter SOLD after 21 years of adventures
Yanmar diesels
Solid Glass Hull
Woodless Stringers
Full Hull Liner
Survived Andrew Cat 5,Eye of Charley Cat 4, & Irma Cat 2
Trojan International Website: http://trojanboat.com/
comodave wrote:You might look at rotdoctor.com. If you can drill some holes and vacuum as much moisture out as possible, then inject some of this resin which can, supposedly, tolerate some moisture. I have not used this product, but it looks very interesting since you do not have to completely dry out the core.
thank you so much for the rotdoctor link! i'm placing an order for the fill it and the tint. i have some dings on my tri cabin and i believe this is the answer to take care of this. the website is great! tons of info and tips.
this is how i'm going to keep busy during my post treatment recovery period before heading back to work at the end of december.
aaron
1982 F-36 TRI CABIN ENTERPRISE
PARKSIDE MARINA IN MIDDLE RIVER, MD aaronbocknek@gmail.com
After digging into this now, I don't really think the pulpit needs any structural reinforcement. I was doing this primarily for cosmetic reasons. The glass is really thick beyond the area I show in the video... incredibly strong. I had a tiny bit of flex if I bounced on the edge. I did have some creaking which went away after tightening the four mounting bolts.
Replacing the plywood will enable me to torque the whole thing down more which will help. The problem is/was stressing the fiberglass by drawing the bolts against wet plywood and balsa. Once that's replaced, I think it will be good as new. I initially thought it was so heavy because of wet wood but there's really not as much "coring" material as I thought.
It looks like the before pictures of my radar arch. All those brown areas is the rotting wood staining the laminate. You really won't know the extent of the rot until you remove that top laminate part. This is what I did, and it seemed to work pretty well:
I took a fibrating tool and made a shallow cut, deep enough to get through the laminate top, which will be about a 1/4" thick. By looking at the picture, I would cut that whole lower section. I then took a chisel and my vibrating tool and removed the laminate. It will take a little work but it will come off. This will allow you to see the extent of the rot. Remove any rotted balsa or plywood. You may consider taking it all out and replacing it with plywood, as it has a little more structural integrity.
Once the wood is removed, I cut a piece of NON TREATED plywood to fit. I then mixed up some Smith's Clear Penetrating Epoxy, put it in a disposable metal pan that was big enough to hold the wood, and soaked the wood for 24 hours. Pull the wood out and allow it to dry for a couple of hours until its just past tacky. Then mix up some West's Epoxy with 404 structural mix. Wet out your work areas, which include the wood and the cleared out area of your pulpit. After it is wetted out, put about 1/2 inch of thickened 404 mixed epoxy in the pulpit void. Put your treated plywood in the void, and place enough pressure to push out the Epoxy around the edges. Clean up the excess epoxy and put some weight on top of the wood.
You can put the cut out laminate back in place by using some fiberglass cloth above and below the laminate.
As good as new. The new wood is impregnated with Epoxy so you should have less problems. Anywhere you have bolts penetrating, cut out a larger hole and fill with thickened epoxy, then redrill the proper size hole for the bolt.
Fun day.
Last edited by todd brinkerhoff on Thu Oct 18, 2012 4:23 pm, edited 3 times in total.
1991 Trojan International 10.8 Meter Express hull# 003 - 454 Crusaders
1961 Century Raven 22 - Gray Marine 327
comodave wrote:You might look at rotdoctor.com. If you can drill some holes and vacuum as much moisture out as possible, then inject some of this resin which can, supposedly, tolerate some moisture. I have not used this product, but it looks very interesting since you do not have to completely dry out the core.
thank you so much for the rotdoctor link! i'm placing an order for the fill it and the tint. i have some dings on my tri cabin and i believe this is the answer to take care of this. the website is great! tons of info and tips.
this is how i'm going to keep busy during my post treatment recovery period before heading back to work at the end of december.
aaron
Hey Aaron,
Also check out Jamestown Distributors. They have all the Smith Epoxy products and may be a bit cheaper than rotdoctor. As for filling some dents and dings in fiberglass, I prefer Wests. I use the Smith products on our 1961 Century Raven, as they are derived from wood resin and maintain some flexibility that matches wood.
If you need Jamestown's website, let me know, I can locate and post it.
Todd
1991 Trojan International 10.8 Meter Express hull# 003 - 454 Crusaders
1961 Century Raven 22 - Gray Marine 327
I completely agree with Todd's method of repair; take it all out and replace with ply. I will say though that based on everything I've studied/read, penetrating epoxy is overrated in my opinion. Of course you'd never know it in reading several manufacturers' web site claims; showing cut cross sections etc. There's a lot of chemistry involved but based on what I've read, what seems to penetrate the most are the thinners used, and that little epoxy actually penetrates any further than the regular stuff would. The extra premium in my opinion is unnecessary. Using warm West System epoxy, then allowing the item to cool for example will cause the epoxy to penetrate further than normal as well. Adding thinners doesn't necessarily carry the epoxy much further into the wood but it definitely diminishes it's strength.
She was a 1969 36 ft wooden beauty with big blue 440s that we'll miss forever.
And thanks to the gang, 2012 Trojan Boater Of The Year
comodave wrote:You might look at rotdoctor.com. If you can drill some holes and vacuum as much moisture out as possible, then inject some of this resin which can, supposedly, tolerate some moisture. I have not used this product, but it looks very interesting since you do not have to completely dry out the core.
thank you so much for the rotdoctor link! i'm placing an order for the fill it and the tint. i have some dings on my tri cabin and i believe this is the answer to take care of this. the website is great! tons of info and tips.
this is how i'm going to keep busy during my post treatment recovery period before heading back to work at the end of december.
aaron
Hey Aaron,
Also check out Jamestown Distributors. They have all the Smith Epoxy products and may be a bit cheaper than rotdoctor. As for filling some dents and dings in fiberglass, I prefer Wests. I use the Smith products on our 1961 Century Raven, as they are derived from wood resin and maintain some flexibility that matches wood.
If you need Jamestown's website, let me know, I can locate and post it.
Todd
thanks todd, i have their catalog as well as defender and hamilton marine. overtons too!!
aaron
1982 F-36 TRI CABIN ENTERPRISE
PARKSIDE MARINA IN MIDDLE RIVER, MD aaronbocknek@gmail.com
Big D wrote:I completely agree with Todd's method of repair; take it all out and replace with ply. I will say though that based on everything I've studied/read, penetrating epoxy is overrated in my opinion. Of course you'd never know it in reading several manufacturers' web site claims; showing cut cross sections etc. There's a lot of chemistry involved but based on what I've read, what seems to penetrate the most are the thinners used, and that little epoxy actually penetrates any further than the regular stuff would. The extra premium in my opinion is unnecessary. Using warm West System epoxy, then allowing the item to cool for example will cause the epoxy to penetrate further than normal as well. Adding thinners doesn't necessarily carry the epoxy much further into the wood but it definitely diminishes it's strength.
That is something I've never tried but I like the idea. It will save me from having to use multiple products. Thanks for the tip Big D!
1991 Trojan International 10.8 Meter Express hull# 003 - 454 Crusaders
1961 Century Raven 22 - Gray Marine 327
One has to remember that the hotter the epoxy the quicker it will kick off, and so you need to work faster or use the slower curing epoxy fomula. I've used this method several times in the early Spring or Fall for example when it's cooler out. All it takes for example is to shine a halogen work lamp on your work to warm it up, then shut the lamp off when you're applying the epoxy so the item will start to cool after applying the epoxy. Depending on how hot your mix gets and ambient temperature, this will be slow as the item will want to cool while the epoxy curring process generates its own heat. Apparently this helps improve penetration...and again we're talking about boats here
She was a 1969 36 ft wooden beauty with big blue 440s that we'll miss forever.
And thanks to the gang, 2012 Trojan Boater Of The Year